Geminite Cement Industries LLC (part of Gemini Group), one of the Middle East’s leading building materials production and distribution players, has selected Infor CloudSuite Industrial Enterprise ERP (enterprise resource planning) solution to optimize delivery against a surging demand for cement boards across the region. Per the press release, Geminite is aiming to automate and integrate its production control systems and plant maintenance solutions, removing the need for manual data entry. The Infor CloudSuite Industrial Enterprise ERP solution will help Geminite boost its efficiency, increase visibility across the business, and provide the agility to expand capacity as needed to cater to the region’s fast-growing demand for gypsum boards. Deployment of this project will start in April 2022 and is expected to go live within five months. ITWare LLC in Dubai, one of Infor’s long-standing ERP channel partners in the region, will be leading the implementation.
https://www.nogalis.com/wp-content/uploads/2019/01/industrial-worker-management.jpeg426640Angeli Mentahttps://www.nogalis.com/wp-content/uploads/2013/04/logo-with-slogan-good.pngAngeli Menta2022-05-04 09:19:052022-05-04 09:20:43Geminite Cement Industries Set to Digitally Transform with Infor
After updating a user’s security settings in Landmark such as adding roles, adding identities, and changing settings, there is usually a refresh period/waiting time. If you don’t want to wait or want to make sure the changes were applied, there is a simple way around this so you can immediately effect the changes rather than waiting for the refresh period.
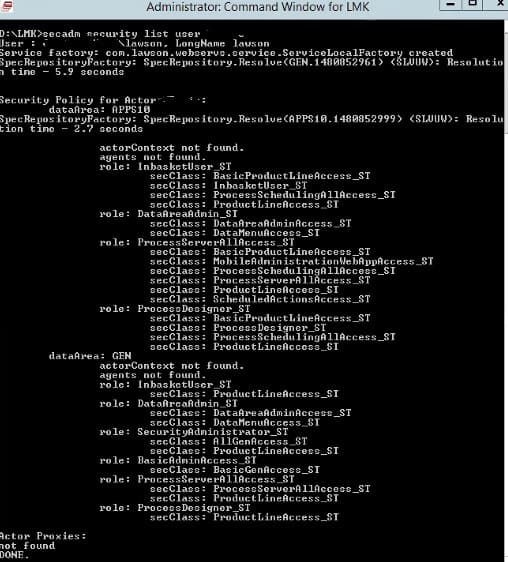
To do this, log into the server as the installation user (lawson). Next, open a landmark command window as administrator.
Run the following command: secadm security list user <username>
That’s all there is to it! Now you don’t have to wait for the refresh period and you can see your changes immediately.
Renowned European hotel and event venue LA VILLA recently decided to upgrade to the Infor HMS hospitality management cloud solution; expecting to boost efficiency and agility as the venue strives to achieve new levels of excellence in providing guest experience. Per the press release, LA VILLA’s management has stressed the importance of an up-to-date software solution that benefits internal organizational capabilities and profitability. With more than 20 years of successful partnerships in the hotel industry, it was a no-brainer for LA VILLA to select the tech giant’s Infor HMS cloud-based management system for their upgrade. Infor HMS will provide LA VILLA managers with comprehensive insight into current business performance and points out potential for improvement. They also have the goal to positively impact the quality of guests’ stays.
https://www.nogalis.com/wp-content/uploads/2021/04/hotel-hospitality-reception-HMS.jpg367550Angeli Mentahttps://www.nogalis.com/wp-content/uploads/2013/04/logo-with-slogan-good.pngAngeli Menta2022-05-02 10:11:292022-04-29 12:47:01Heavenly Hospitality Venue in the Cloud
After configuring ADFS, if you attempt to launch LBI and receive the message “(security:3042) Unable to authenticate user”, go to the SystemOut.log to gather more information. If the error is displayed there without any reference to the user name, it is most likely that you need to update DSP on the LBI server. To do this, download the latest DSP from the product downloads under Lawson Security. Stop all the IBM services on the LBI server, then run the jar file and select the option to update your existing DSP. Once DSP is updated, restart the IBM services. You should be able to launch LBI now.
[12/18/21 14:16:53:783 PST] 000000ce LocalTranCoor E WLTC0017E: Resources rolled back due to setRollbackOnly() being called.
[12/18/21 14:16:53:784 PST] 000000ce webapp E com.ibm.ws.webcontainer.webapp.WebApp logServletError SRVE0293E: [Servlet Error]-[ServletNameNotFound]: com.lawson.efs.security.GeneralAuthenticationException: (security:3042) Unable to authenticate user.
at com.lawson.efs.security.authenticationprovider.AbstractSSOAuthenticationProvider.authenticate(AbstractSSOAuthenticationProvider.java:174)
…
Caused by: com.lawson.lawsec.authen.SecurityAuthenException: Failed to initialize authentication layer. Cause Connection error (inforapp.cosa.private, null). Cause: {2}.
… com.lawson.security.authen.AuthenMessages.Unable to create a connection
Stack Trace :
com.lawson.security.server.LawsonNetException: Unable to create a connection
https://www.nogalis.com/wp-content/uploads/2022/04/LBI-3042-error-after-configuring-ADFS.jpg470470Angeli Mentahttps://www.nogalis.com/wp-content/uploads/2013/04/logo-with-slogan-good.pngAngeli Menta2022-04-29 08:47:432022-04-26 09:50:28LBI 3042 error after configuring ADFS
Customer Relationship Management (CRM), while not a new offering, is still a ‘new’ concept for many businesses. What exactly is a CRM? A CRM system is a tool used by a company to manage and track customer interactions within your business. The tools at your disposable in your CRM system are pertinent to learning about your customer’s preferences, behaviors, buying patterns, etc. With this real-time data available at your fingertips, CRM systems prove to be advantageous for those companies wanting to have a competitive edge. An informative article on newswatchtv.com shares five major benefits of having a CRM implemented for your company.
A CRM system can help you keep track of your customers’ contact information and preferences, making it easier for you to provide them with the personalized service they continue to desire.
A CRM system can give you a 360-degree view of your customers, allowing you to better understand their needs and how best to serve them.
A CRM system can automate many of the tedious and time-consuming tasks associated with customer relationship management, freeing up your staff to focus on more important things.
A CRM system can help you track and measure key metrics such as customer satisfaction and lifetime value, allowing you to continuously improve your business.
A CRM system can be a powerful marketing tool, helping you segment and target your marketing efforts more effectively.
No two companies will have the same CRM strategy, but every company can benefit from implementing this tool.
https://www.nogalis.com/wp-content/uploads/2018/04/CRM-software-customer-relationship-management.jpg493740Angeli Mentahttps://www.nogalis.com/wp-content/uploads/2013/04/logo-with-slogan-good.pngAngeli Menta2022-04-28 16:50:072022-04-28 17:11:295 Advantages a CRM System Can Bring to your Business
Syapse, a real-world evidence company dedicated to extinguishing the fear and burden of serious disease by advancing real-world care, has seen recent success with Infor CloudSuite Cloverleaf, built on Amazon Web Services® (AWS). Per the press release, Syapse chose Infor to take data from a wide variety of community health systems and provide insights that can positively influence ongoing patient care. As a data-driven healthcare organization, they rely on compiling real-world evidence that illustrates the entire course of cancer care for patients. With Infor’s help, Syapse can better collect, analyze, and leverage massive amounts of pertinent data that can have significant consequences for patients and healthcare providers. Syapse’s partnership with Infor aims to elevate its three primary operational priorities—compiling and processing data intelligence, using analytics to draw insights, and applying them to patient care. Further, since its implementation, Infor Cloverleaf has provided Syapse’s certified team of tumor registrars with access to patient records that are used to enhance and validate data, creating a curated patient database that’s far more robust in usability and applicability.
https://www.nogalis.com/wp-content/uploads/2019/11/healthcare-it-crm.jpg360620Angeli Mentahttps://www.nogalis.com/wp-content/uploads/2013/04/logo-with-slogan-good.pngAngeli Menta2022-04-27 09:37:142022-04-26 09:39:17Syapse Partners with Infor to Revolutionize Cancer Care
Bulk Insert (delivered with SQL Server) is a great way to quickly import data into SQL Server tables. The input file format does not need to match the column definition on the table. You can use import file definitions for that.
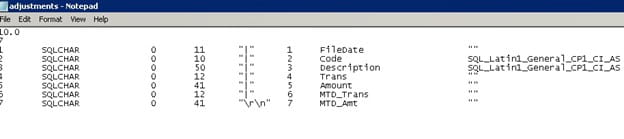
To create an import file definition, first go to the SQL server where the database table resides. Run the command bcp <database>.<owner>.<tablename> format nul -c -f <local path>\<filename>.fmt -t, -T
(For clarity, best practice is to name the file the same as the table name).
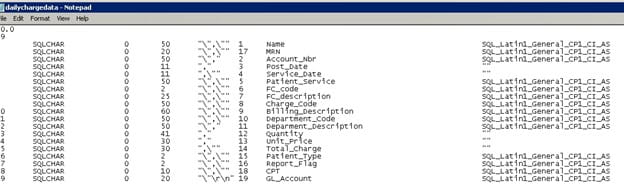
Edit the format file (if needed) in a text editor to accommodate for any differences between the input file and the database table. The first column is the order of fields in the input file. The 5th column provides the delimiter between fields. The 6th column maps to the appropriate field in the database table. The number at the top (below the version “10.0”) describes how many fields are in the input file. If you are not using all the fields from the input file, you must adjust this number accordingly. If you say it is looking for 20 fields, it will be looking for 20 fields and will error if 20 fields aren’t found.
CSV files are a little tricky, as you need to accommodate for double quotes.
Note that the files must be accessible by a local path on the SQL Server machine.
The Bulk Insert command is:
BULK INSERT <table name>
FROM ‘<full path to import file>
WITH (FORMATFILE = ‘<full path to format file>’, FIRSTROW = <first row of data in the import file>)
https://www.nogalis.com/wp-content/uploads/2022/04/Using-Bulk-Insert-for-interfaces.jpg470470Angeli Mentahttps://www.nogalis.com/wp-content/uploads/2013/04/logo-with-slogan-good.pngAngeli Menta2022-04-26 07:56:152022-04-22 09:27:29Using Bulk Insert for interfaces
In recent news, more manufacturing companies are turning to modern manufacturing ERP solutions from Infor to digitize and increase the efficiency of their production. Tatra Trucks, Škoda Transportation and, most recently, the traditional tractor manufacturer Zetor Tractors are among the customers of Infor’s industry-specific ERP systems focused on discrete manufacturing in Central and Eastern Europe (CEE). Per the press release, Zetor Tractors has decided to deploy Infor’s ERP solution, replacing multiple subsystems to centralize and digitize business processes. The worldwide supplier of tractors expects that the broad functionality and integration of the ERP system and complementary applications will allow its more than 500 employees to manage the rapidly changing demands of customers more flexibly. Further, in the Czech Republic and Slovakia, Infor ERP solutions have traditionally been used mainly by companies in the manufacturing sector, helping them to streamline and automate discrete manufacturing processes and bring industry-specific functions tailored to their requirements.
https://www.nogalis.com/wp-content/uploads/2017/04/infor_sign.jpg578770Angeli Mentahttps://www.nogalis.com/wp-content/uploads/2013/04/logo-with-slogan-good.pngAngeli Menta2022-04-25 10:09:102022-04-21 11:07:40Infor Strengthens its Position in the Czech Republic’s Manufacturing Sector
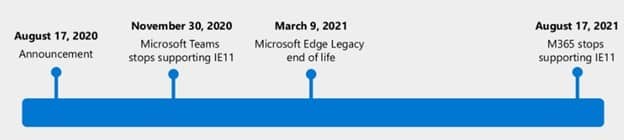
Internet Explorer 11 is losing Microsoft’s support on June 15, 2022.
What does this mean?
In a nutshell, IE11 will no longer be secure after June 2022. Vulnerabilities will not be fixed after this date. You’ll also experience more issues as other applications get updates while IE11 does not.
How will this affect Lawson users?
As Infor updates their Landmark, Mingle, Portal applications, (especially cloud-based apps), IE11 will run into more and more issues and most importantly will be vulnerable to security threats such as phishing and malware. This will be the same story with third-party applications that integrate into IE such as MHC’s Image Express.
What should my organization do?
First, use a modern browser like Chrome or Microsoft Edge and make sure you’re on a supported version of Windows.
Your organization should also look into getting on a supported version of Lawson if they are not already. Update third-party and customized Lawson applications to use modern browsers.
If your in-house Lawson team is not well-equipped to perform mass Lawson upgrades/migrations, it is best to hire a Lawson Managed service consultant team to assist in getting your organization up-to-date. They often are more agile with a wider range of resources and expertise. Additionally, if your company has migrated from Lawson but still have historical data taking up space in your servers, you should look at archiving solutions that can give you the freedom to completely eliminate all Lawson footprint from your organization.
https://www.nogalis.com/wp-content/uploads/2022/04/Internet-Explorer-11-end-of-life-and-what-it-means-for-Lawson-users.jpg470470Angeli Mentahttps://www.nogalis.com/wp-content/uploads/2013/04/logo-with-slogan-good.pngAngeli Menta2022-04-22 09:11:092022-04-22 09:12:32Internet Explorer 11 end of life and what it means for Lawson users
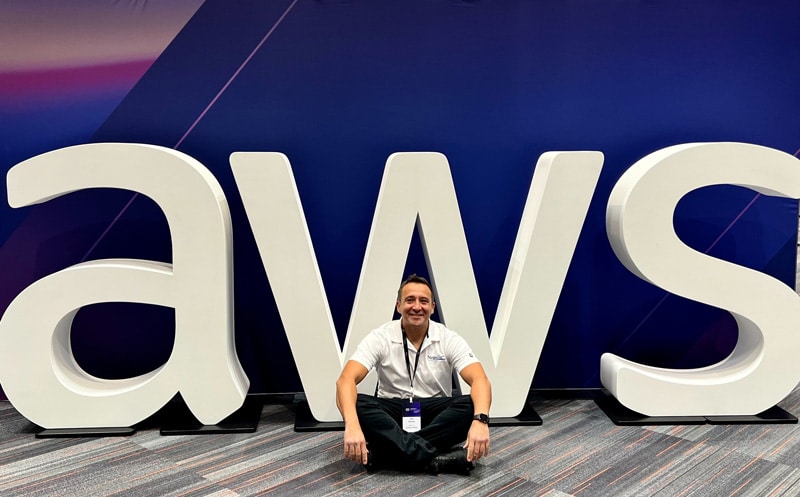
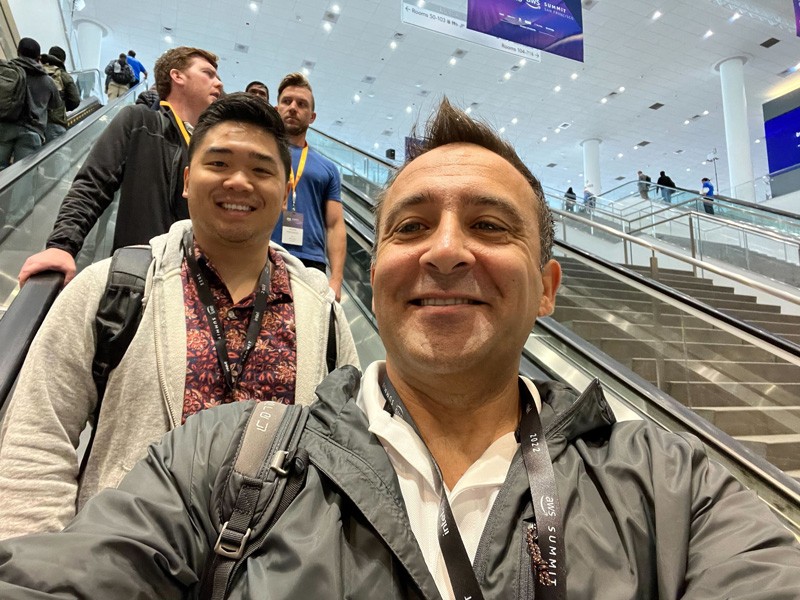
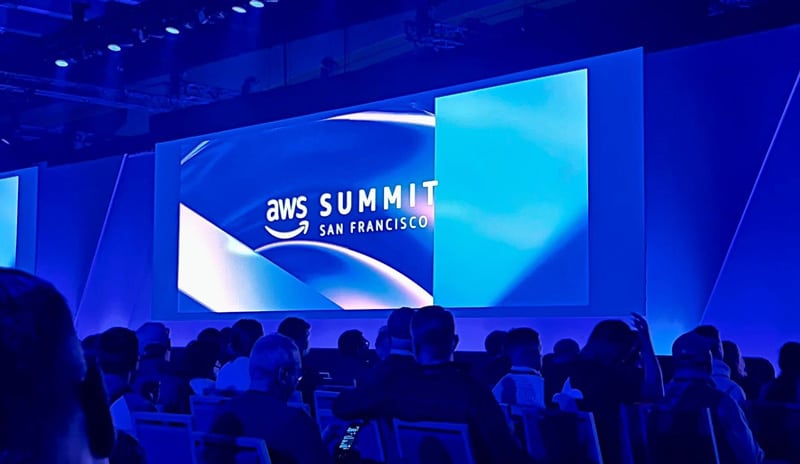
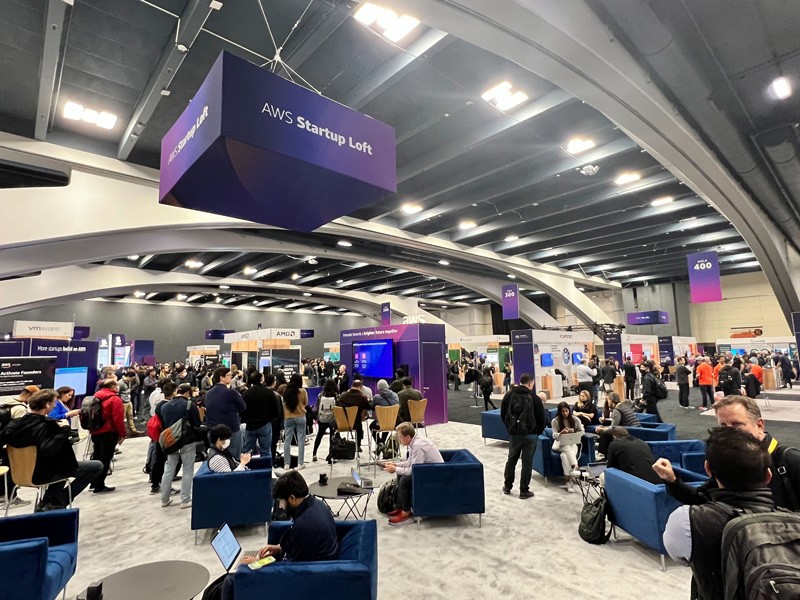
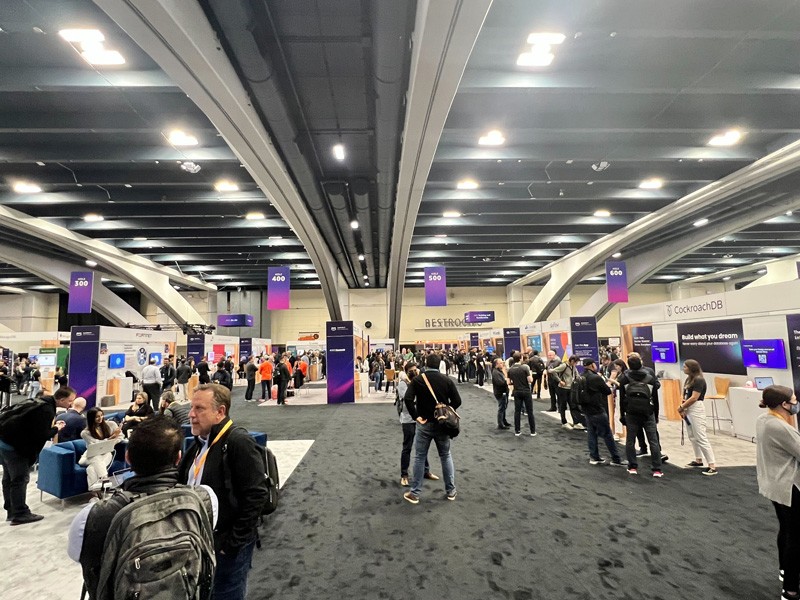
One of the largest technology events kicked off for the Spring – the AWS Summit in San Francisco, CA. Nogalis, Inc., as well as other industry experts in the cloud computing space, had a front row experience at what AWS has in store.
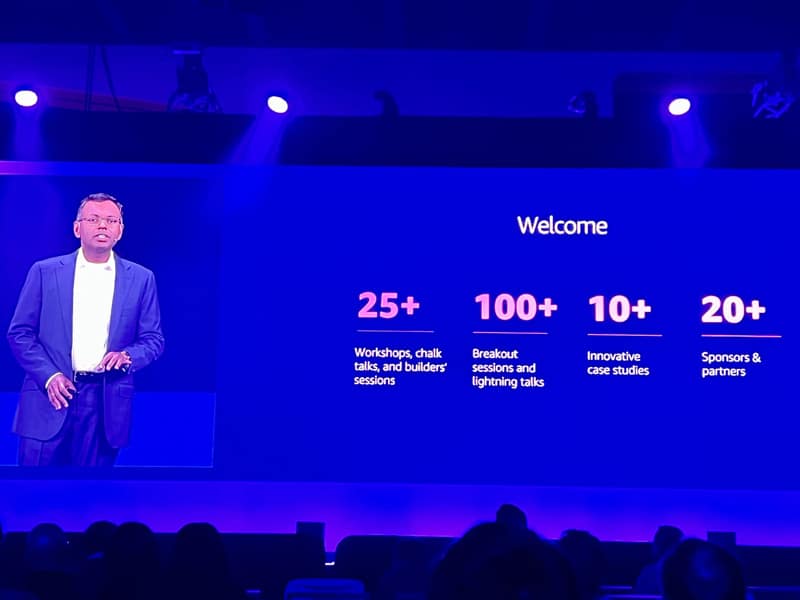
AWS Summit San Francisco welcomed industry leaders, partners and experts on a two-day immersive experience – discovering how AWS can help you innovate quickly and deliver flexible, reliable solutions at scale. Attendees of the event get first access to the latest news from AWS leaders, learn new skills, and network with industry peers. Per the AWS website, “Over the two days, attendees will be able to hear from AWS experts, customers, and partners on how to leverage the cloud computing technology and learn the technology with interactive content.”
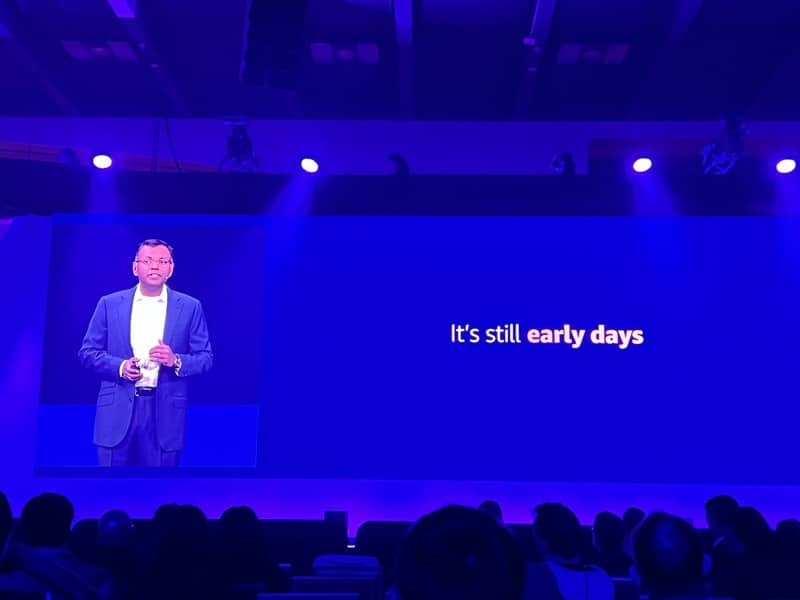
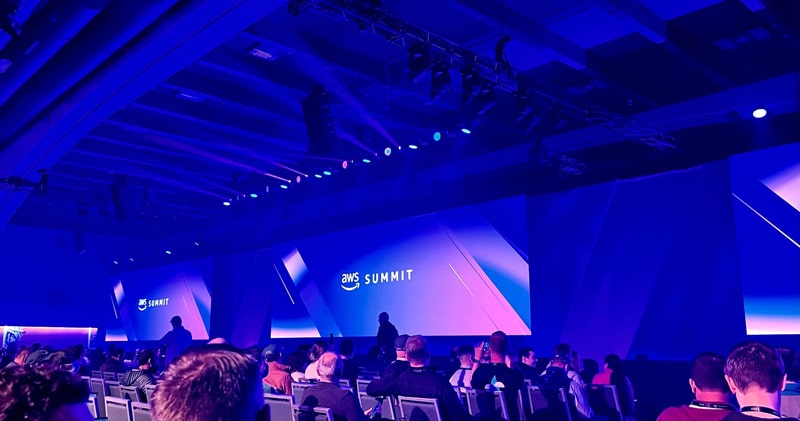
This year’s keynote speaker Swami Sivasubramanian – Vice President of Data, Analytics, and Machine Learning Services, Amazon Web Services – shared some exciting innovations that can make AWS the best place to run your applications, while also making better, faster decisions with your data. AWS is delivering and developing the next generation of cloud infrastructure to transform your business. While AWS is regarded as the world’s most comprehensive and broadly adopted cloud platform, Sivasubramanian made a powerful statement regarding the future of this platform, indicating there is more to come. “AWS, despite 11 straight years of being the leader in the magic quadrant still believes it’s still early days.”
Keynote Speaker Swami Sivasubramanian address a forward thinking attitude regarding the state of AWS – “It’s still early days.”
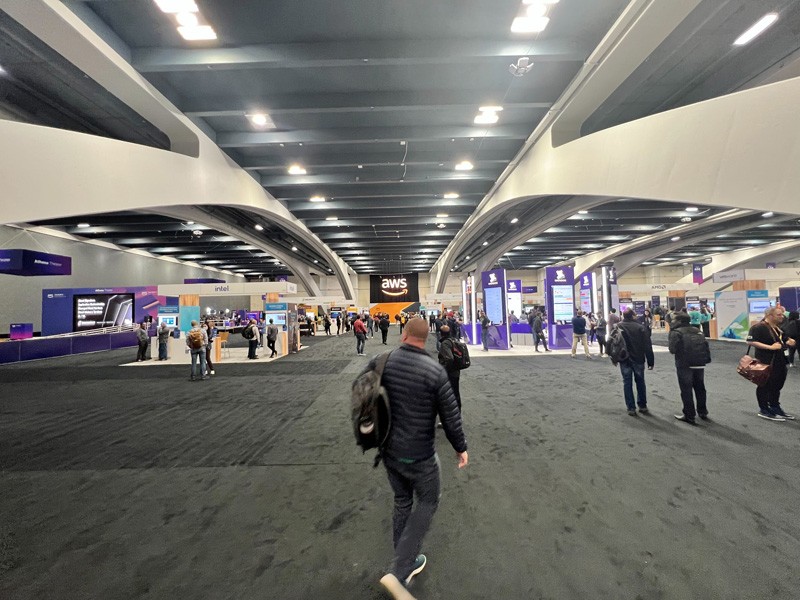
AWS’s flexibility to run any application is the driving factor as to why Nogalis has successfully integrated this cloud platform to their business services. Being part of this event, our AWS knowledge and expertise continues to stay cutting edge as our software engineers will utilize the vital material learned from this experience to harness the power of big data, and put it to work for our customers, gaining a greater business advantage.
https://www.nogalis.com/wp-content/uploads/2022/04/AWS-Summit-Nogalis-1.jpg497800Angeli Mentahttps://www.nogalis.com/wp-content/uploads/2013/04/logo-with-slogan-good.pngAngeli Menta2022-04-21 14:39:332022-04-21 14:45:42Nogalis, Inc & Other Industry Experts Attend AWS Summit San Francisco