The Return Activity node in IP Designer is useful for stopping the flow when specified conditions are met, and returning information to the calling process, such as a trigger.
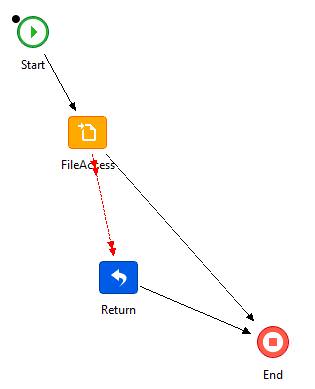
In this example, we have an error connection between the file access node and the Return Activity Node. In this case, if there is an error in the File Access Node, information will be returned to the calling process by the Return Activity Node.
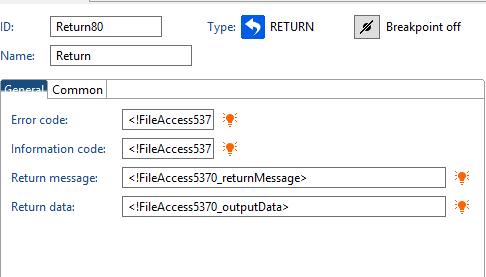
The Return Activity node can return four fields: Error Code (integer), Information Code (integer), Return Message (string), Output Data (string or binary). These four fields can be populated with variables or with hard-coded information. In the example, we chose to populate them with the codes and messages generated by the File Access node.
As you can see, the Return Activity Node is a very efficient method of stopping a process and returning the results to the calling application.