
Sometime you may have a need to update your LDAP bind connection, such as when the domain controller you are bound to is decommissioned.
To update the LDAP bind connection,
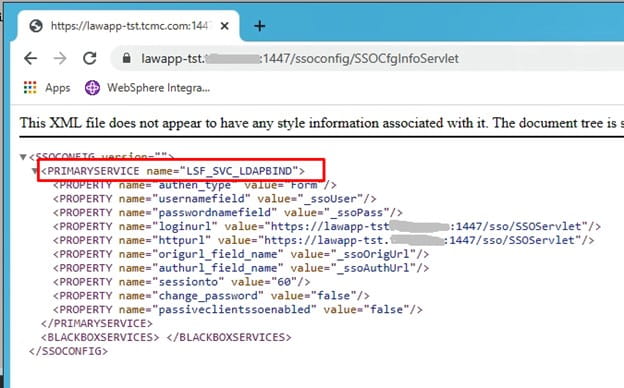
First figure out which service is using ldap bind. To do that, go to http(s)://<server>:<port>/ssoconfig/SSOCfgInfoServlet. Make a note of the service name displayed on the page.
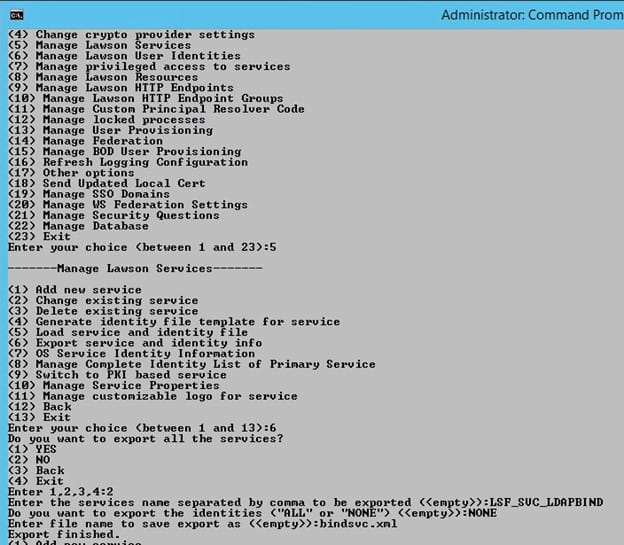
Next, log into ssoconfig and export that service:
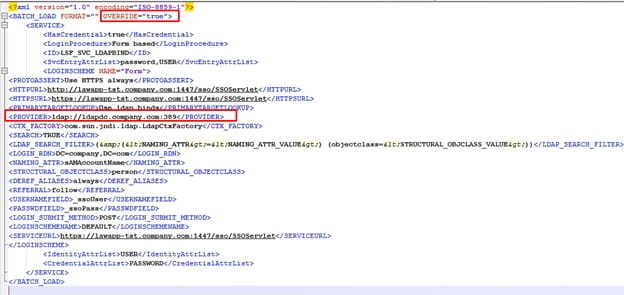
Now, open the file you just exported. Update the OVERRIDE attribute to “true”. Update the “PROVIDER” element to the new server and port.
Next, upload your updated file into ssoconfig. The syntax is ssoconfig -l <password> <full file path>
For example:

Ssoconfig data is stored in the security cache, so you will need to recycle your system for this change to take effect.
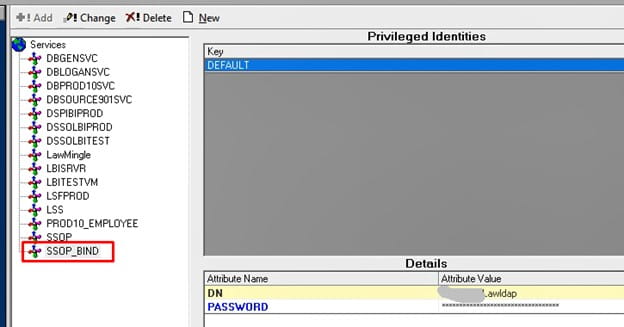
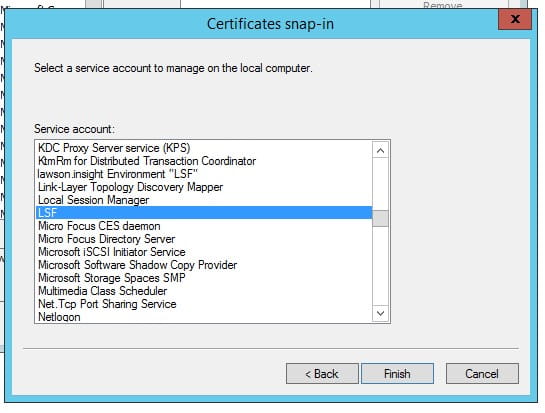
NOTE: If you need to change the credentials for the domain controller, this will be an extra process. You will need to update the service associated with your LDAP bind. This is most likely your SSOP_BIND service. You can look under privileged identities in Lawson Security, check for a “DEFAULT” key associated with your ldap bind user. That is your LDAP bind service.
To update the credentials for this service, log into ssoconfig and select Manage privileged access to services > Change existing identity. Enter the service that you noted above. Enter the correct user DN. Enter the password.

Recycle Lawson.
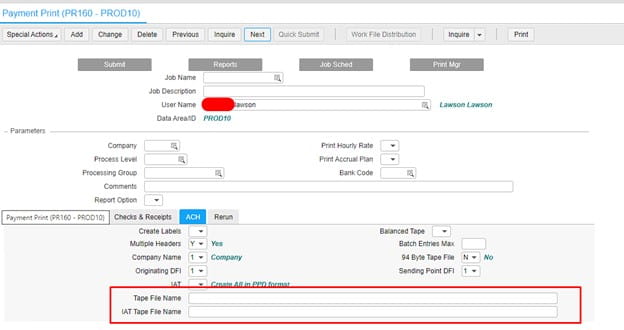
If you have a PR160 job that goes into recovery because your ACH path is not correct:
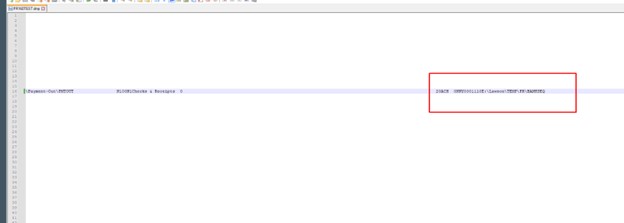
You can modify the exact PR160 job that is in recovering by dumping the job with jobdump command in Lawson Interface Desktop (LID).
Example of command: jobdump -d -o Job -v UserName joesmoe jobdump.dmp
What to change: jobdump -d -o Job -v UserName <your_jobs_username> <enter_the_jobname>.dmp
Edit the dumped job file and change the ACH path ONLY and recover the job to see if it is resolved.
Load the job in report mode (to check for errors): jobload -o Job jobdump.dmp
Load the job in commit mode if it looks good: jobload -c -o Job jobdump.dmp


Problem:
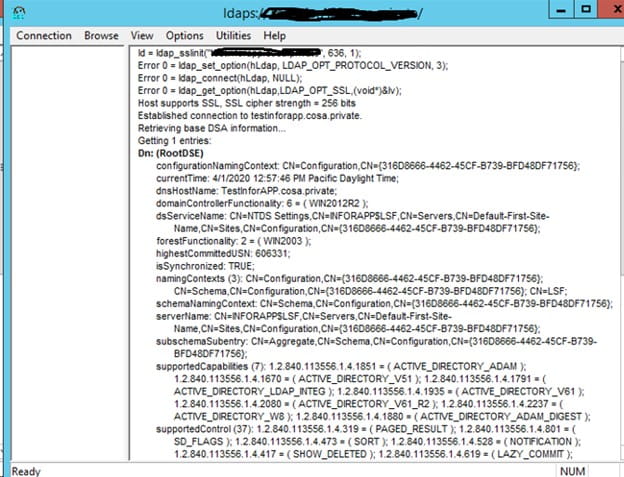
If your controller is failing and you need to move the LSF LDAP to another controller
Resolution:
Edit the ldapbind information in the SSOP service and reload it.
<BATCH_LOAD FORMAT=”” OVERRIDE=”false”>
to
<BATCH_LOAD FORMAT=”” OVERRIDE=”true”>
and this line to the new machine name and port:
<PROVIDER>ldap://dc1.lawson.com:3268</PROVIDER>
to
<PROVIDER>ldap://dc2.lawson.com:3268</PROVIDER>
ssoconfig -l ssoconfig_password filename.xml
Exit.
To suppress Receiving Delivery and Putaway (PO134) delivery tickets when MSCM Delivery Documents are all that is needed is to disable the Back-Office PO Receiving (PO30) Receiving Delivery and Putaway (PO134) delivery ticket by removing the printer from PO Receiving (PO30) or create a dummy printer to stop the back-office delivery ticket from printing.
Removing the printer from PO Receiving (PO30) only works if the user does not have a default printer assigned to them. After being removed, the default printer will simply populate back in the field upon clicking change.
Additionally, an enhancement to PO Company Setup (PO01) was added which provides a flag called “Delivery and Putaway Ticket Print” which allows disabling the delivery ticket printing at the company level.
Perform these same steps in the Landmark websphere instance.
Do this in both Lawson and Landmark
Resolution 1:
One reason you could be receiving this error is because there is an additional patch.tar file from a previous or concurrent CTP install.
After running the tar command you should only have 3 files for this CTP in the <versionfiledir> that you uncompressed the CTP to.
Examine the extracted files to make sure you received the following three files:
– x.x.x_patch_CTPnumber.readme.html
– Versions
– patch.tar.Z
Remove any previous CTP files from this directory, especially any patch.tar files, and run the lawappinstall again.
Resolution 2:
If you are encountering this error on a Windows server it is possible that you have spaces in the folder names of the path to the versions dir. You would receive the failed to uncompress message if this is true.
Use a “_” for the space, or use folders that do not contain a space in the name and run the lawappinstall again.
Resolution 3:
Make sure the user you are applying the patch with has the proper Windows file permissions to install the patch. This should be the entire LSF application directory.
Problem:
Patch being installed if failing when running lawappinstall activate. It fails when running ujobload.
10/31/2023 5:44:25 Executing ujobdump.
10/31/2023 5:44:25 ujobdump execution successful.
10/31/2023 5:44:25 Executing ujobload.
10/31/2023 5:44:26 ERROR – ujobload failed.
ujobload via lawappinstall activate *** No jobs found to load When run manually, it fails with Segmentation Fault(coredump:
Resolution:
lawappinstall update will stage tokens potentially needing a ujobdump/ujobload in LAWDIR/productline/backup/ACTIVATEstage/JOBconversion.
If conditions are correct, lawappinstall activate will run ujobdump and ujobload, then clean up the staged area.
In the above <list of Tokens> would be a space-separated list of the tokens located in $LAWDIR/productline/backup/ACTIVATEstage/JOBconversion/??src directories.
Run steps a through d manually, then rerun lawappinstall activate. If the ujobload fails in step b with a Segmentation Fault(coredump) or other error, make sure the user running ujobload has write access to these files and their directories.
LAWDIR/UJobLoadDir/productline/Tokens
LAWDIR/productline/UJobLoadDir/LDLog
Make corrections if necessary, run steps b through d above, and rerun lawappinstall activate.
Problem:
Sometimes when running a CTP patch install preview GENDIR/bin/lawappinstall preview <productline> , the program is executing lasetup with the preview option, and is displaying the following error:
ERROR – failed to uncompress “patch.tar.Z” file.
Installation YEAREND126174.preview of YEAREND126174 terminated abnormally (start = 12/20/2023 13:27:01, stop = 12/20/2023 13:27:01).
ERROR – lasetup execution unsuccessful.
lawappinstall PREVIEW YEAREND126174.preview installation completed unsuccessfully at 12/20/2023 13:27:01.
Resolution:
Follow these simple steps to resolve the issue above.
perl LUUsetup.pl -c E:\LUU