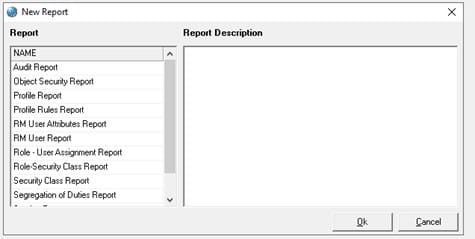
Problem:
If your controller is failing and you need to move the LSF LDAP to another controller
Resolution:
Edit the ldapbind information in the SSOP service and reload it.
- Create a dump of the SSOP service:
- ssoconfig -c
- Option 5 Manage Lawson services
- Option 6 Export service and identity info
- Option 2 for not all services
- Enter SSOP in upper case
- Enter NONE in upper case
- Give a filename (it will write out the file to the directory you are in when you run the ssoconfig -c command.) Example: ssop_prod.xml
- Exit the ssoconfig menu.
- Make a copy of the .xml file that you just created. This is your backup of the SSOP service in its original state.
- Then edit the first .xml file and change the following lines:
<BATCH_LOAD FORMAT=”” OVERRIDE=”false”>
to
<BATCH_LOAD FORMAT=”” OVERRIDE=”true”>
and this line to the new machine name and port:
<PROVIDER>ldap://dc1.lawson.com:3268</PROVIDER>
to
<PROVIDER>ldap://dc2.lawson.com:3268</PROVIDER>
- Save the file.
- Do one of the following to load the modified SSOP service file:
ssoconfig -l ssoconfig_password filename.xml
Exit.
- A stop and start of the Lawson environment and WebSphere application server is required in order for this to take affect.
To suppress Receiving Delivery and Putaway (PO134) delivery tickets when MSCM Delivery Documents are all that is needed is to disable the Back-Office PO Receiving (PO30) Receiving Delivery and Putaway (PO134) delivery ticket by removing the printer from PO Receiving (PO30) or create a dummy printer to stop the back-office delivery ticket from printing.
Removing the printer from PO Receiving (PO30) only works if the user does not have a default printer assigned to them. After being removed, the default printer will simply populate back in the field upon clicking change.
Additionally, an enhancement to PO Company Setup (PO01) was added which provides a flag called “Delivery and Putaway Ticket Print” which allows disabling the delivery ticket printing at the company level.
Installing LDAP certificate in AD LDS instance
- Identify the AD LDS service instance in Services
- LSF
- Launch MMC (Microsoft Management Console)
- Choose File > Add/Remove Snap-In
- Add the certificates Snap-In
- Choose “Service” account and click “Next”
- Choose “Local Computer” and click “Next”
- Choose the Service Account for your AD LDS service and click “Finish”
- Right-click on the service that was added and select “All Tasks > Import”
- Click next and browse to the .pfx certificate file. Click “Next”
- Enter the private key password
- Place the certificate in the <AD LDS service>\Personal store
- Click Next then Finish
Export the certificate for Java OS & Java WebSphere
- Right click the certificate > All Tasks > Export and click Next
- Do not export the private key
- Choose Base-64 encoded X.509 (.cer) and click Next
- Choose a location to save the file for later use
- Click finish
Grant Permissions to Certificate Container
- Run command “certutil -store MY’
- Find the container with your AD LDS certificate using the thumbprint to identify it
- Give NETWORK SERVICE read & execute permissions on the key container file AND the key container directory (C:\ProgramData\Microsoft\Crypto\RSA\MachineKeys)
- Stop the AD LDS environment service
- Restart the AD LDS service
Smoke Test
- Open the ldp.exe tool
- Type the server FQDN > SSL port and check the SSL box
- Click “OK”
- Successful connection to LDAPS
Update the LDAP Certificate in WebSphere
Cell Trust Store
- Access the WAS Admin Console and navigate to: Security > SSL certificate and key management > Key stores and certificates > CellDefaultTrustStore > Signer certificates
- Click the Retrieve from port button.
- Host: <your AD LDS host>
- Port: 636
- Alias: give it a meaningful name
- Click Retrieve signer information.
- Click OK & save changes.
Node Trust Store
- Access the WAS Admin Console and navigate to: Security > SSL certificate and key management > Key stores and certificates > NodeDefaultTrustStore (for the LSF server) > Signer certificates
- Click the Retrieve from port button.
- Host: <your AD LDS host>
- Port: 636
- Alias: give it a meaningful name
- Click Retrieve signer information.
- Click OK & save changes.
Perform these same steps in the Landmark websphere instance.
Update LDAP Certificate in OS Java
Do this in both Lawson and Landmark
- Open a command line and set environment variables
- Run command “where java” to determine where LAW_JAVA_HOME is located
- Back up <LAW_JAVA_HOME>/jre/lib/security/cacerts
- Copy the cert that you exported from the LSF service from the Lawson server to the Landmark server
- This is the cert you will be importing into cacerts
- Run the ikeyman utility at WAS_HOME/bin
- Open the LAW_JAVA_HOME/jre/lib/cacerts file and select the Key database type of JKS
- Type password “changeit” (default)
- Select “Signer Certificates”
- Delete the existing certificate, then re-add it
- Click “add” and navigate to the ldap certificate exported earlier
- Give it a meaningful name
Update LDAP Certificate in WebSphere Java
- WebSphere Java directory is WAS_HOME/Java
- Back up files WAS_HOME/java/jre\security/cacerts
- Peform the same steps as OS Java using iKeyman for both Java instances
Resolution 1:
One reason you could be receiving this error is because there is an additional patch.tar file from a previous or concurrent CTP install.
After running the tar command you should only have 3 files for this CTP in the <versionfiledir> that you uncompressed the CTP to.
Examine the extracted files to make sure you received the following three files:
– x.x.x_patch_CTPnumber.readme.html
– Versions
– patch.tar.Z
Remove any previous CTP files from this directory, especially any patch.tar files, and run the lawappinstall again.
Resolution 2:
If you are encountering this error on a Windows server it is possible that you have spaces in the folder names of the path to the versions dir. You would receive the failed to uncompress message if this is true.
Use a “_” for the space, or use folders that do not contain a space in the name and run the lawappinstall again.
Resolution 3:
Make sure the user you are applying the patch with has the proper Windows file permissions to install the patch. This should be the entire LSF application directory.
Problem:
Patch being installed if failing when running lawappinstall activate. It fails when running ujobload.
10/31/2023 5:44:25 Executing ujobdump.
10/31/2023 5:44:25 ujobdump execution successful.
10/31/2023 5:44:25 Executing ujobload.
10/31/2023 5:44:26 ERROR – ujobload failed.
ujobload via lawappinstall activate *** No jobs found to load When run manually, it fails with Segmentation Fault(coredump:
Resolution:
lawappinstall update will stage tokens potentially needing a ujobdump/ujobload in LAWDIR/productline/backup/ACTIVATEstage/JOBconversion.
If conditions are correct, lawappinstall activate will run ujobdump and ujobload, then clean up the staged area.
- ujobdump -d LAWDIR/productline/backup/ACTIVATEstage/JOBconversion productline $LAWDIR/productline/backup/ACTIVATEstage/JOBconversion.dmp -t <list of Tokens>
In the above <list of Tokens> would be a space-separated list of the tokens located in $LAWDIR/productline/backup/ACTIVATEstage/JOBconversion/??src directories.
- ujobload -ou productline LAWDIR/productline/backup/ACTIVATEstage/JOBconversion.dmp
- remove dump file, LAWDIR/productline/backup/ACTIVATEstage/JOBconversion.dmp
- remove stage dir, LAWDIR/productline/backup/ACTIVATEstage/JOBconversion
Run steps a through d manually, then rerun lawappinstall activate. If the ujobload fails in step b with a Segmentation Fault(coredump) or other error, make sure the user running ujobload has write access to these files and their directories.
LAWDIR/UJobLoadDir/productline/Tokens
LAWDIR/productline/UJobLoadDir/LDLog
Make corrections if necessary, run steps b through d above, and rerun lawappinstall activate.
Problem:
Sometimes when running a CTP patch install preview GENDIR/bin/lawappinstall preview <productline> , the program is executing lasetup with the preview option, and is displaying the following error:
ERROR – failed to uncompress “patch.tar.Z” file.
Installation YEAREND126174.preview of YEAREND126174 terminated abnormally (start = 12/20/2023 13:27:01, stop = 12/20/2023 13:27:01).
ERROR – lasetup execution unsuccessful.
lawappinstall PREVIEW YEAREND126174.preview installation completed unsuccessfully at 12/20/2023 13:27:01.
Resolution:
Follow these simple steps to resolve the issue above.
- Backup the current LUU directory
- Create a new blank folder for LUU
- Update the pl program to LUU
- Run the following command:
perl LUUsetup.pl -c E:\LUU
- Finally, run the CTP preview again. There should be no more errors.
What do the Lawson Base Mingle Roles Control?
- “Infor-SuiteUser” is the end-user role. This is the default role assigned to all the users. Users with this role have access to the portal only. The portal is one of the components of the Infor Ming.le application. The portal consists of a top level header, an app switcher panel, search, the user menu, share, bookmarks, and a right panel (context/utility applications panel). The users with this role only do not have access to the social space or ION-related features.
- The “MingleEnterprise” role provides access to the social space component of the Infor Ming.le application. The social space component consists of activity feeds, connections, and groups.
Users who have this role can do these actions:
-
- View the activity feed page
- Post messages to colleagues and groups
- Create new groups
- Connect to users and groups
- “MingleAdministrator” is the role assigned to users to have access to administration pages in Infor Ming.le.
By design, the “MingleAdministrator” role is added to all applications in the tenant. The user with this role can view all application icons on the App Switcher panel. The user’s ability to open the application and access functionality, however, is controlled by the application security.
Users who have this role can see the Admin Settings menu item under the profile menu.
Users who have this role can do these actions:
-
- Manage applications
- Manage context/utility applications
- Manage drillbacks
- Manage general settings
- The user with the “MingleAdministrator” role also needs the “MingleEnterprise” role in order to administer some of the users’ related features in social space.
These users can also do these actions:
-
- Manage users’ feeds and groups’ feeds
- Delete any Infor Ming.le group
- Deactivate the users and groups and also reactivate them
- “MingleIONEnabled” is a role that allows users to access ION-related features within Infor Ming.le.
ION-related components consist of alerts, tasks, ION notifications, and workflows.
Users who have this role can do these actions:
-
- View alerts and perform all the actions in the alerts
- View tasks and ION notifications and perform all the actions in the tasks and ION notifications
- Alerts and Tasks options are displayed in the user menu for the users who have this role.
When the ADFS Token-Signing certificate is updated on the ADFS server, it will have to be imported to Lawson and Infor OS. The networking team should let the Lawson team know when the certificate is being updated in ADFS.
Someone with admin rights on the ADFS instance will need to export the certificate and provide you with the “.cer” file before these tasks can be completed.
Update the Certificate in Lawson
Log onto the Lawson Server
Start a ssoconfig -c session
Go to “Manage WS Federation Settings” > “Manage Certificates”
Select “Delete WS Federation Certificate”
Select “Create certificate for “WS Federation”
Select “Delete IdP certificate”
Enter the service name of your ADFS service (if you are unsure, export all the services and look for the one that redirects to your ADFS server).
Select “Import IdP Certificate”
Enter the service name of your ADFS service
Provide the full path where you have the token-signing certificate saved
Reboot the server
Update the Certificate in Infor OS
Log into the Infor OS server as the LAWSON user
Log into the InforOSManager (should be an icon on the desktop)
Go to Identity providers on the left side
Double-click on your IdP
Select “From URL” to import the new certificate and metadata
Provide the URL: https://<your adfs server>/federationmetadata/2007-06/federationmetadata.xml
Click “Load”
Make sure the certificates load (there may only be one, but there should be at least one)
Reboot the server