Follow the steps below to add a new context app in Infor OS Portal. In this example, we will enable the app for Infor Lawson S3.
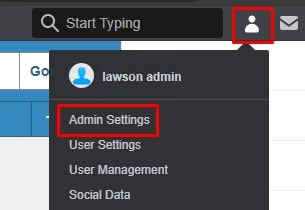
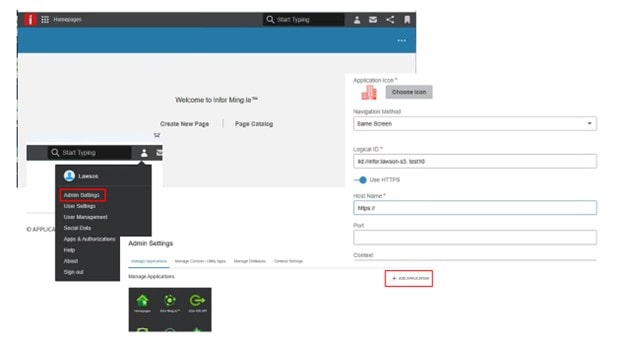
Log into Infor Portal and Click on User Settings > Admin Settings
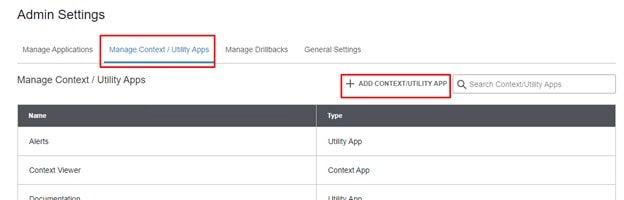
Go to the Manage Context / Utility Apps tab and select “ADD CONTEXT/UTILITY APP”
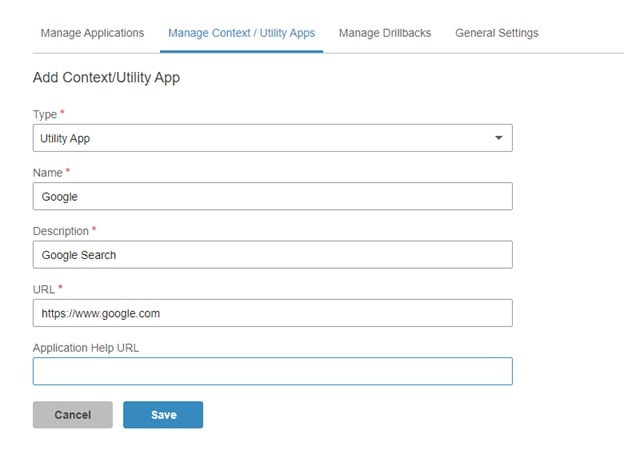
Enter a Type, Name, Description, and URL. Click Save.
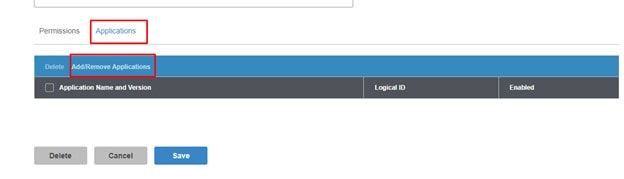
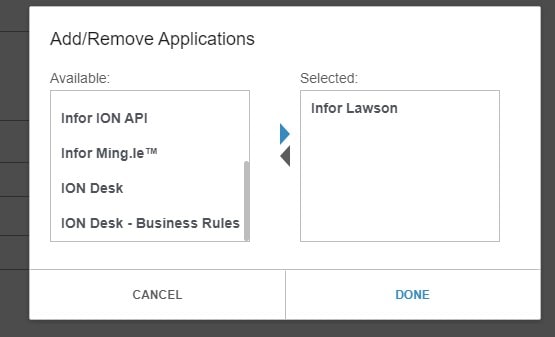
Now, add the application(s) that will be using this context app. At the bottom of the screen, select the Applications tab and select “Add/Remove Applications”.
Select the application(s) and click Done
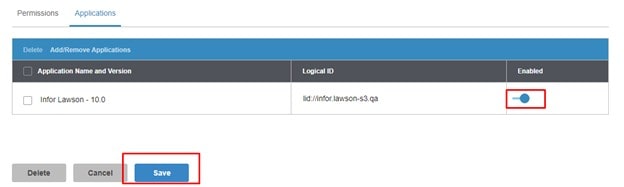
Be sure to Enable to application and then click “Save”
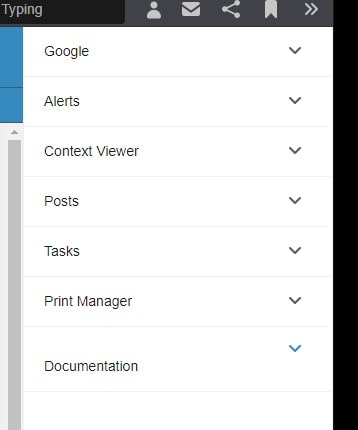
Your context app now shows up in the right side menu
https://www.nogalis.com/wp-content/uploads/2025/04/Adding-Context-Apps-in-Infor-OS-Portal.jpg470470Angeli Mentahttps://www.nogalis.com/wp-content/uploads/2013/04/logo-with-slogan-good.pngAngeli Menta2025-05-02 08:05:082025-04-30 11:07:42Adding Context Apps in Infor OS Portal
Need an Access Lawson database to reside on the desktop of select users without having to relink all the tables each time?
If so, see the below query for the DSN-less connection with a function to relink all the tables and pass-through queries. This also just works for databases in general. Good luck!
If this process seems too complex or time-consuming, Nogalis offers expert managed services to help you manage and optimize your Lawson databases, including handling table linking and other database configurations. Whether you’re looking to simplify data management across multiple machines or improve overall system performance, our team can provide the support you need—without the overhead of a full-time, in-house staff. Contact us to learn more about how we can assist with your Lawson environment.
https://www.nogalis.com/wp-content/uploads/2022/02/How-to-preserve-linked-Lawson-tables-in-Access-when-copying-to-different-machines-min.jpg470470Angeli Mentahttps://www.nogalis.com/wp-content/uploads/2013/04/logo-with-slogan-good.pngAngeli Menta2025-04-29 09:38:562025-04-21 17:41:44How to preserve linked Lawson tables in Access when copying to different machines
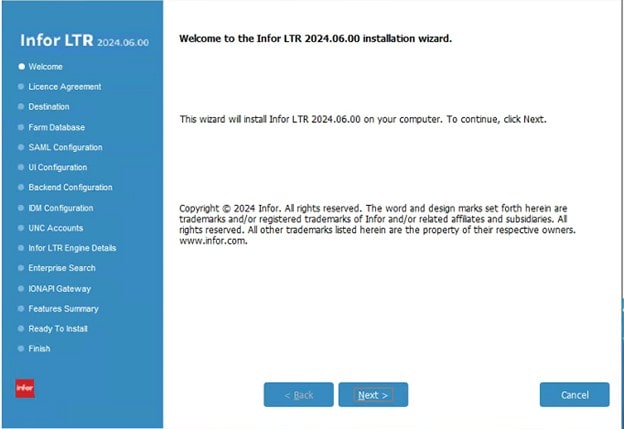
This article will give you all the information you need to know about the Infor OS decommission, as well as what you will need to migrate from Infor OS on-prem to Infor LTR on-prem.
What is happening?
Infor OS and Infor OS Lite on-premises are moving to sustaining maintenance on March 31, 2025. Sustaining maintenance means that there will be no new patches, updates, or fixes for Infor OS. The pre-existing patches and documentation will remain available.
Reason for the Change
On-premises Infor OS installations are currently running on outdated software components, including outdated versions of Windows, Java, SQL Server, and .Net Framework. The new product, Infor LTR, will allow all for all of these components to be upgrade to newer and more secure versions.
What are my Options?
On-premises customers have three options for handling this change:
Purchase a new MT Infor OS license tier (SaaS)
This is a cloud offering from Infor that would create a hybrid environment for clients. Infor OS would run in the cloud, and can still be used for SSO authentication, and your remaining Infor applications could stay on-prem.
Upgrade to Infor LTR
Take no action and continue to use Infor OS (this contains risks)
What are the Risks of Staying on Infor OS?
Keeping Infor OS can cause your organization to miss out on important security updates. It also would require your organization to maintain an application on outdated technology, which can be a security risk.
What is Infor LTR?
Infor LTR is a core technology runtime service, that is a “wrapper” for Infor applications. It serves as a single hub where users can log into one URL and then access all their Infor applications from a menu. Infor LTR will be supported until at least 2029.
How to Upgrade
To upgrade from Infor OS to Infor LTR, it is possible to do an in-place upgrade procedure. For a one-step upgrade, you must currently be on Infor OS 2021.12 or higher. If you’re not on a compatible version of Infor OS, you’ll need to first upgrade Infor OS to one of those versions, and then you can upgrade to Infor LTR.
The upgrade process has the exact same look & feel, and the same installer as Infor OS, so if you have previously done an Infor OS upgrade, you will not have any learning curve.
Server & Compatibility Specifications
Before starting any kind of Infor upgrade, please first read the installer document for the exact specifications. As of the writing of this article, these are the specifications for Infor LTR:
Microsoft SQL Server 2022, 2019, or 2017
Windows 2022 or 2019
.NET Framework 4.8
AWS Corretto JDK 17 (Infor LTR requires a very specific minor version, so be sure to check your documentation before downloading)
Minimum Hardware
4 CPU Cores*
32 GB of RAM*
Install drive of 50GB+
Data/content drive of 300GB+
*NOTE: These are minimum hardware recommendations. If you are going to use Infor LTR for SSO authentication, it is recommended that you increase the CPU cores and RAM.
Using Infor LTR with Web Applications
Infor LTR offers the same Infor web application utilities as Infor OS. You can set up menu widgets for applications such as Lawson, LBI, and MSCM. You can still use the direct URL to access these applications. Infor LTR is not required the access your Infor web apps, but it is required for compliance with your Infor licensing. Infor LTR is required if you want your Infor applications to authenticate using an identity provider other than ADFS.
Here are some basic screenshots of setting up and application in Infor LTR:
Infor LTR as STS
Infor LTR can be used as the SSO authentication application for all your Infor web applications. You can authenticate using multiple different identity providers (IdP). For instance, you can configure Infor LTR to authenticate with Azure AD, MS Entra, AD FS, or Okta.
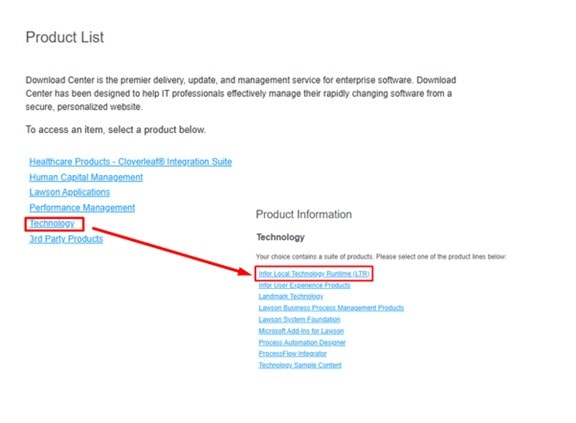
Where do I get Infor LTR?
Check your product downloads under Technology > Infor Local Technology Runtime (LTR). If you do not see LTR in your product downloads, reach out to your Infor account rep
https://www.nogalis.com/wp-content/uploads/2025/04/Upgrading-to-Infor-LTR-min.jpg470470Angeli Mentahttps://www.nogalis.com/wp-content/uploads/2013/04/logo-with-slogan-good.pngAngeli Menta2025-04-25 08:51:542025-04-21 17:55:25Upgrading to Infor LTR
There are occasions when Infor Support will request you to report if you are able to access all validation links. To find the links for validation, follow the steps below:
First, in file explorer, go to the InforLandmark folder
In the folder, you should have an htm file for the validation URLs (see screenshot)
Next, double click on the file to open it.
Click on each of these links to validate you can access each link.
Finally, send Infor the screen shots of any links that have errors so they can review.
https://www.nogalis.com/wp-content/uploads/2025/01/How-to-find-and-run-the-Landmark-Validation-URLs.jpg470470Angeli Mentahttps://www.nogalis.com/wp-content/uploads/2013/04/logo-with-slogan-good.pngAngeli Menta2025-04-22 10:13:062025-04-21 17:21:59How to find and run the Landmark Validation URLs
Enterprise Resource Planning (ERP) systems are essential for managing core business functions but their central role also introduces significant risks if not properly secured. To prevent costly fraud and compliance issues, IT and business leaders must prioritize effective Segregation of Duties (SoD) and user access management. In an article on ERP Today, written by tech expert Jennifer Lawinski, she emphasizes the importance of enhancing ERP security through smarter Segregation of Duties (SoD) and user access management. The article highlights that ineffective access controls can lead to fraud, errors, and compliance issues, making it crucial to implement robust policies. Automation tools can help identify and mitigate risks by continuously monitoring user activities and access rights. Regular audits and reviews ensure that access privileges remain appropriate over time. Role-based access control (RBAC) simplifies management by assigning permissions based on job roles, reducing errors. Dynamic access management adapts to changing organizational needs, improving security and efficiency. The article advocates for integrating security solutions with existing ERP systems to streamline oversight. It stresses the importance of strong authentication methods, such as multi-factor authentication, to prevent unauthorized access. User provisioning and de-provisioning should be automated to minimize human error. Implementing real-time alerts for suspicious activities can help detect potential breaches early. Establishing clear policies and training staff enhances adherence to security protocols. Regular risk assessments identify vulnerabilities proactively. Combining technology with governance ensures comprehensive security coverage. The article notes that organizations often overlook the complexity of SoD conflicts, which can be mitigated with smarter tools. It advocates for a risk-based approach to access management, prioritizing high-risk areas. Proper documentation and audit trails support compliance with regulations like SOX or GDPR. Continuous improvement of access controls aligns security with evolving threats. The article concludes that smarter SoD and user access management are vital for safeguarding ERP systems effectively. Investing in these practices reduces the likelihood of security breaches and financial losses.
https://www.nogalis.com/wp-content/uploads/2024/12/data-security-it.jpg360540Angeli Mentahttps://www.nogalis.com/wp-content/uploads/2013/04/logo-with-slogan-good.pngAngeli Menta2025-04-21 17:45:322025-04-21 17:45:32Strengthen Your ERP Security with Smarter SoD and User Access Management
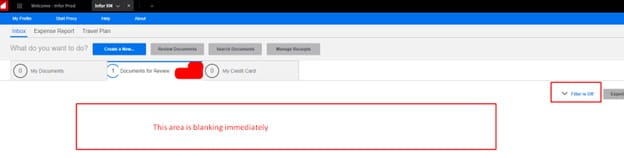
Problem: when logging into Infor XM (Expense Management) and clicking Documents to review, the section expands and closes immediately and is left blank.
First check your filters are cleared:
If the filters are cleared, this is a browser related caching issue. To clear your browser follow the steps below.
Google Chrome Browser:
Select Chrome browser and on your keyboard press CTRL + SHIFT + DELETE
Select the Advanced Tab
Time Range set to “All time”, check the “Cached Images and files” and Cookies boxes
Select Delete Data and close the browser completely to test again.
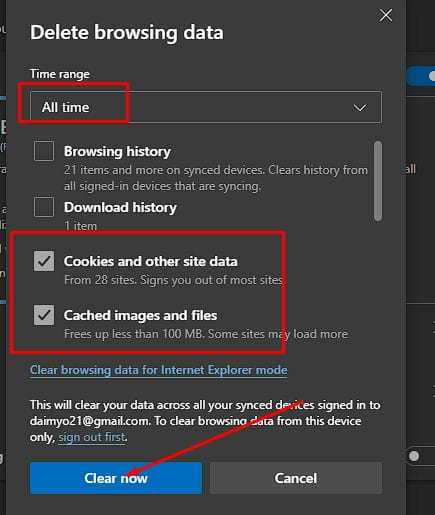
Microsoft Edge Browser:
To clear browsing info stored on your device, like saved passwords or cookies:
Select Microsoft Edge and on your keyboard press CTRL + SHIFT + DELETE
Time Range set to “All time”, check the “Cached Images and files” and Cookies boxes
Click Clear now and close the browser
https://www.nogalis.com/wp-content/uploads/2025/04/Lawson-Expense-Management-Documents-closes-immediately.jpg470470Angeli Mentahttps://www.nogalis.com/wp-content/uploads/2013/04/logo-with-slogan-good.pngAngeli Menta2025-04-18 07:58:382025-04-07 18:05:08Lawson Expense Management Documents for Review closes immediately to a blank screen
Hotkeys are shortcut key combinations that cut down on the number of clicks required to complete a task. Administrators can edit or create hot key combinations to provide to end users. Lawson Portal roles can be used to make hot keys available to users.
To edit hot keys,
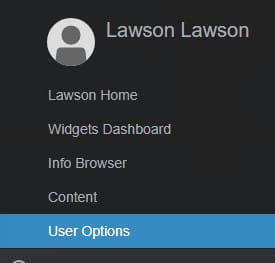
Go to the navigation menu under the General group, and select User Options.
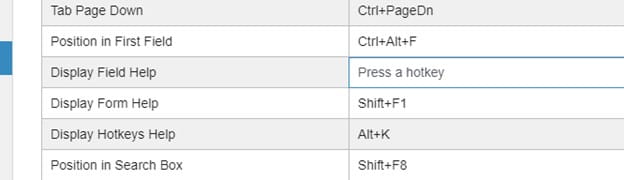
Click the Hotkeys tab.
Decide which hot key you are editing, and click in the Hotkey cell.
Select the hotkey combination on your keyboard that you want to use