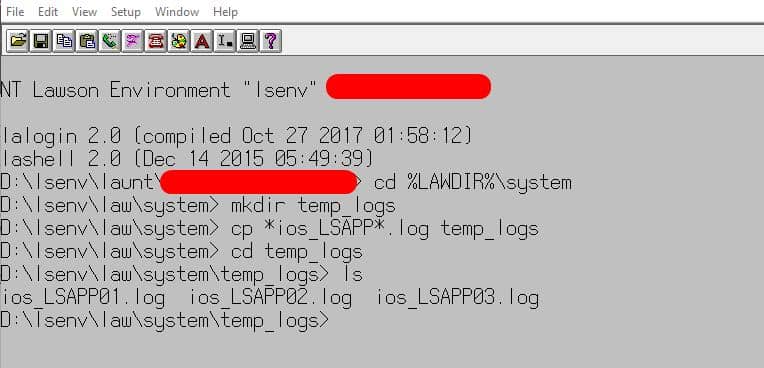
In Lawson v10, Admin users would have direct access to system logs but in the cloud, you’re access is limited to FTP access.
Problem: Reviewing IOS and LADB logs live is more difficult through FTP since you’re unable to download or view a file that is currently being written to. To get around this you simply use the copy line command or cp.
To understand this process, follow the steps below:
Step 1: Open LID and connect to the Lawson environment you want to access logs from.
Step 2: Go to %LAWDIR%\system directory
Step 3: Create a new folder in %LAWDIR%\system directory, command is: mkdir temp_logs (this will create a folder called temp_logs)
Step 4: In %LAWDIR%\system type this command (change based on your log names):
cp *ios_lsapp*.log temp_logs
Step 5: Go to %LAWDIR%\system\temp_logs and run the ls command to view your copied log files or simply download them from the FTP.
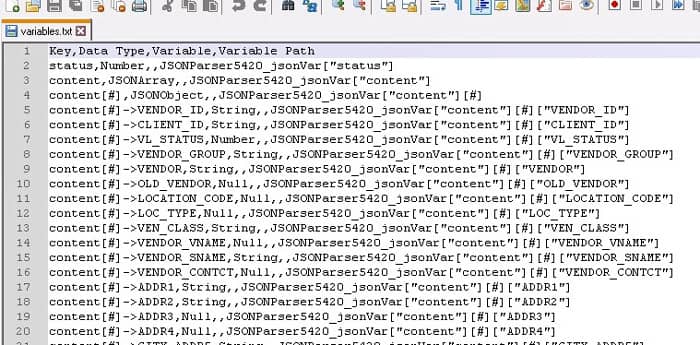
Here is a screenshot of my results: