Problem:
After running an Infor Security Services (ISS) sync, I have found the errors related to the failed IDENTITY records.
Resolution:
Determine which system, Lawson System Foundation (LSF) or Landmark (LMK), the identity record failed in by reviewing the following:
security_provisioning.log(s). All transactions completed in ISS related to user maintenance, federation, and synchronization, are logged in the LAWDIR/system/security_provisioning.log(s). Please note there may be several security_provisioning.logs with different naming conventions that contain the information that rolled out of the main security_provisioning.log and you may need to review all the updated logs to find the information you need.
Open the most recent provisioning log and go to the bottom of the log. If nothing has been done in ISS since the sync completed you should see a message similar to the one below followed by a list of records that failed:
Thu Apr 26 16:56:01.282 CDT 2023 – default-457261151: Sync Analysis for object type IDENTITY completed with status=true
Thu Apr 26 16:56:01.282 CDT 2023 – default-457261151: Sync Analysis successfully completed for object type IDENTITY
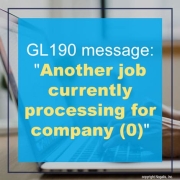
Thu Apr 26 16:58:52.073 CDT 2023 – 1360326122: Sync Execution successfully completed for Task ID[4,963] with failed transactions for Sync Records:
The list of records that failed is limited to one section of the sync. You will see a list of either roles, actors, services, domains, endpoints endpoint groups or identities, depending on which section of the sync had failed records. This is because once the sync completes the analysis or execution of the section with the failed records the sync process will not continue. You must address the failed records to continue the sync.
Alternately you can search the log for the word “completed” to find the most recent section of the sync process that completed. There will be a completed message for each section of the sync.
To find the exceptions for the failed records you will need to search within the log(s) each failed record. For each failed record you will search for the value from the list without the semicolon at the end of the line:
For failed record ACTOR=user1; you would search for “ACTOR=user1”
After finding the exception in the log, scroll up in the log until you see a message such as this:
Wed Dec 4 12:19:45.528 EDT 2023 – default-137596214: Getting resource from INFORBCLM01.INFORBC.COM;9906;9907;LANDMARK
or
Wed Dec 4 12:13:24.761 EDT 2023 – default-1973664225: Getting resource from INFORBCLS01.INFORBC.COM;6626;6627;LSS
or
Wed Dec 4 12:19:43.440 EDT 2023 – default-1973561960: 1973561960 Processing record #4,996 of LSF
or
Wed Dec 4 12:19:43.440 EDT 2023 – default-1973561960: 1973561960 Processing record #4,986 of LANDMARK
Messages that reference LSS or LSF indicate the issue is in LSF and the record should be reviewed in that system. Messages that reference LANDMARK indicate the issue is in LMK and the record should be reviewed in that system.