If you’re reviewing an Infor Process Automation log and notice the “Error: Unable to lookup RMI object rmi://localhost:16003/dbSecurity” or something similar firing on a FileAccess node, this means your bpm.ear config file got updated (possibly from an environment update) and needs to be fixed.
To resolve this, you’ll need to update the dbrmihostname field from “localhost” to the LSF server domain name in the bmp.ear file. See steps below.
To update the bpm.ear and bpm.war files follow the steps below:
You must run the command from the same directory as where the bpm.ear file and bpm.war file exist:
cd %GENDIR%/assembly/products/bpm/jar
Execute the perl script to rebuild the files, providing the new RMI port and hostname of your LSF machine:
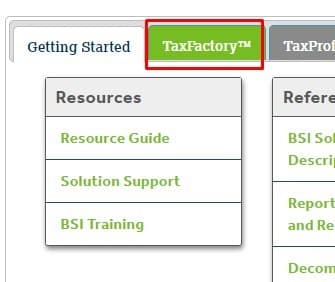
Click Add New Key >> Select Desired Version and enter Host Name where BSI is being hosted.
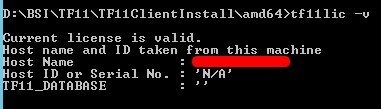
Note: To verify current Host Name of license, open command prompt, change dir to where tf11lic.exe is located and type following command tf11lic -v
One you enter the New Key Info, select the Request Server Key button
You should now see your newly added Machine Key, click Save as File to download
Copy the machinekey.lic file to the server where TF11 is installed and the tf11lic.exe is located
In command prompt, cd to where tf11lic.exe is and type this command: tf11lic -i machinekey.lic
Type tf11lic -v to validate if the license is valid.
In Lawson portal, calculate a PR80 record to verify Lawson is connecting to BSI
Connect to Lawson Interface Desktop >> jobschd >> recover PA100 job in recovery (or any other job that requires a valid BSI license that went into recovery)
That’s it! Good luck!
https://www.nogalis.com/wp-content/uploads/2021/11/Lawson-PA100-Job-Goes-into-Recovery-due-to-On-Prem-BSI-License-Expiring.jpg470470Angeli Mentahttps://www.nogalis.com/wp-content/uploads/2013/04/logo-with-slogan-good.pngAngeli Menta2021-11-23 08:04:522021-11-19 15:50:45Lawson PA100 Job Goes into Recovery due to On-Prem BSI License Expiring
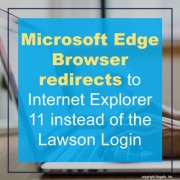
If you’re using Microsoft Edge and trying to access Lawson but it’s redirecting you to an IE11 browser page with the error: “The request contained illegal input and was cancelled”, there is an easy solution to resolve this.
This issue is caused by using a deprecated Legacy version of Microsoft edge instead of a new Microsoft Edge Chromium version.
The best way to verify you’re using the correct browser, is comparing the Edge browser icons (see below)
Using the New Edge version should resolve this annoying redirect and get you into Lawson faster since IE11 is no longer supported.
Good luck!
https://www.nogalis.com/wp-content/uploads/2021/11/Microsoft-Edge-Browser-redirects-to-Internet-Explorer-11-instead-of-the-Lawson-Login-Page-min.jpg470470Angeli Mentahttps://www.nogalis.com/wp-content/uploads/2013/04/logo-with-slogan-good.pngAngeli Menta2021-11-19 08:21:072021-11-14 20:26:43Microsoft Edge Browser redirects to Internet Explorer 11 instead of the Lawson Login Page
You may have installed a new BSI update/license or need to verify if it’s safe to run an update batch job.
An easy way to do this is to run a simple smoke test in PR80.
Login to Lawson portal and go to PR80
Start with a company, employee, bank code, and payment number
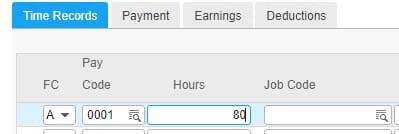
Under the Time Records tab FC >> Add >> Pay Code 0001 >> Hours 80
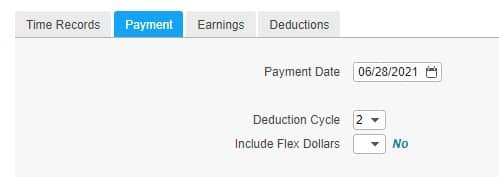
Go to Payment Tab >> Select a Payment Date >> Deduction Cycle 2
Now click Calculate and wait for it to finish.
You should be brough to a HR99.1 Messages form with warnings etc. This means everything ran and Payroll communicated with BSI.
NOTE: Remember that the parameters above may be different for your organization and most can be anything since we are simply testing to see if Payroll is communicating with BSI by doing a calculation. As long as we are selecting Calculate, nothing is being changed with the record.
Good luck!
https://www.nogalis.com/wp-content/uploads/2021/11/How-to-verify-if-Lawson-Payroll-is-working-with-BSI.jpg470470Angeli Mentahttps://www.nogalis.com/wp-content/uploads/2013/04/logo-with-slogan-good.pngAngeli Menta2021-11-16 08:09:412021-11-14 20:26:19How to verify if Lawson Payroll is working with BSI
When William Lawson, Richard Lawson, and John Cerullo founded Lawson Software in Minneapolis in 1975 they probably had no idea it would serve customers for nearly 1/2 a century. It has been a very impressive run that has created entire communities along the way. Whether you have been a user, an implementer, or somehow otherwise involved in the ecosystem, you have no doubt felt like you have been part of a community. As a consultant who started out with the Summit Group back in 1999 and later worked directly for Lawson software I have spent nearly every workday of the past 22 years working with Lawson. It is bittersweet therefore to be talking about this subject of decommissioning this brilliant application. With more and more customers migrating to CloudSuite applications and other ERP systems over the next few years, it makes sense now more than ever to begin planning the proper way to decommission the Lawson application.
The easy part of decommissioning is unplugging the servers. The hard part is to figure out a plan that ensures continuity with minimal disruption to the business. Therefore any discussion of decommissioning and archiving of an ERP application has to include the following three components:
Data Retention
Accessibility and Auditability
Security
Data Retention
Most organizations have data retention policies that are derived from industry or regulatory requirements. This is a good starting point. Working with subject matter experts within HR, Payroll, Finance, and Procurement, will flush out additional requirements around specific items like pay stubs, open invoices, or personnel action history to name a few. The important thing is to ensure whatever plan you have for decommissioning satisfies these requirements.
Accessibility and Auditability
Retaining data is fine and good, but you will need access to it if it’s going to serve its purpose. There is a lot to unpack here but the main requirements with accessibility are:
Intuitive User Interface – Given that this data is historical it doesn’t make sense that any interface to it should need extensive training.
Integration with AD – Future proofing your archived data means user accessibility must be supported for the duration of the data retention period and remain compliant with your IT standards for years to come.
Auditability – One of the main utilities of archived data is to serve the needs of auditors. In this capacity, your archival solution must provide reporting capabilities that can satisfy all audit requirements without the need for further skills or professional services.
Security
Under normal circumstances, your Lawson data is heavily secured with specific access rules in place to ensure prevention of improper access, segregation of duties, and malicious intrusion. The fact is that the security of this data is just as important in archive status as it was when it was in production. Any viable solution must have the ability to secure the data in such a way that satisfies all your data security requirements.
We built the APIX platform from the ground up with these specific requirements in mind. Our clients have been able to completely decommission Lawson in as little as six week and still get full access to their data through the APIX lightweight interface. Contact us to schedule a demo of the APIX Lawson Data Archive solution today!
https://www.nogalis.com/wp-content/uploads/2021/11/How-to-Decommission-Lawson.jpg470470Angeli Mentahttps://www.nogalis.com/wp-content/uploads/2013/04/logo-with-slogan-good.pngAngeli Menta2021-11-15 07:11:352021-11-14 20:43:25How to Decommission Lawson
Follow this step-by-step guide to set up a Lawson deljobhst recurring job. This will keep your Lawson print/job directories clean.
Login to LID (elevated admin rights required)
Go to jobdef and create a new deljobhst job
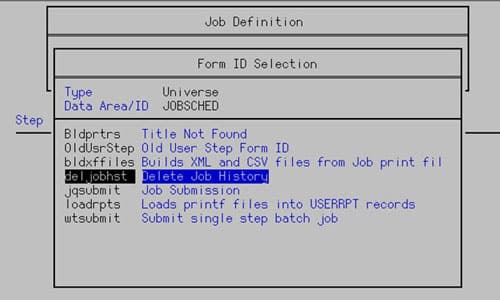
Down arrow to Form ID >> F4
Type >> F4 >> Universe >> Enter
Data Area/ID >> F4 >> JOBSCHED >> Enter
Down arrow to deljobhst >> Enter
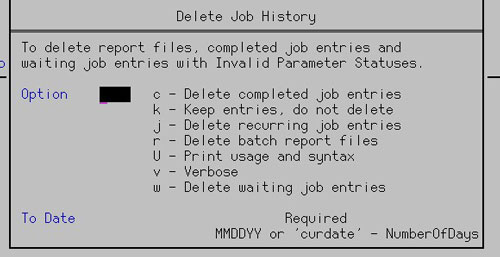
F6 >> A. Step Parameter
Type the parameter letters you want without a dash, for this example we are just deleting old %LAWDIR%\print directory files using the r parameter and for any files > 400 days old
To Date must be in the above format of: ‘curdate’ – NumberOfDays
When the job runs on schedule, files greater than and equal to the date 400 days ago from current date will be deleted.
400 day example: Todays date is 6/7/2021 so print files as created on 5/3/2021 and older will be deleted.
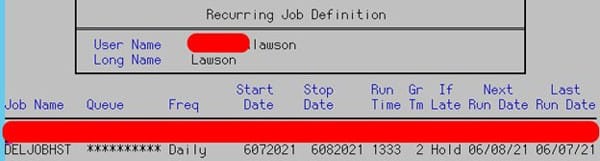
Press Enter to save jobdef and go to recdef in LID
Create a new recdef entry and select the job you just created under Job Name. Select all other parameters as you normally would.
Example below: This job will run daily at 1:33pm starting 6/7/2021
That’s it and good luck.
https://www.nogalis.com/wp-content/uploads/2021/11/How-to-setup-a-Lawson-deljobhst-recurring-job-to-keep-your-Lawson-print-job-directories-clean.jpg470470Angeli Mentahttps://www.nogalis.com/wp-content/uploads/2013/04/logo-with-slogan-good.pngAngeli Menta2021-11-11 09:36:532021-11-05 14:41:48How to setup a Lawson deljobhst recurring job to keep your Lawson print/job directories clean
It is pretty common for a Lawson recurring job to error out and continually run for hours and days. This can build up in the waiting screen of the job scheduler (jobschd). To clean it up can be repetitive when it doesn’t have to be.
Login to LID
Go to the job scheduler by typing the jobschd command
F7 >> A. to show all user jobs
In our example we have 7 jobs, but this method works for hundreds of jobs.
On the top most job that you want to delete press the HOME key to “mark” the job. Notice the black arrow on the very left
Now scroll down or even page down to the bottom most record >> Press the END key. Notice all jobs from the top to bottom have the black arrow on the left, indicating these are selected.
Now press F9 (Delete) to remove these jobs. Press enter to confirm.
NOTE: if there are dozens or hundreds of jobs, you may need to hold Enter to continuosly delete them.
Hope this was helpful!
https://www.nogalis.com/wp-content/uploads/2021/11/How-to-mass-delete-Lawson-waiting-jobs-in-the-job-scheduler-in-LID.jpg470470Angeli Mentahttps://www.nogalis.com/wp-content/uploads/2013/04/logo-with-slogan-good.pngAngeli Menta2021-11-09 07:59:012021-11-05 14:36:22How to mass delete Lawson waiting jobs in the job scheduler in LID
LBI Smart Notifications are reports that are sent directly to users for reviewing vs a user logging into LBI to manually view a report. In this section we will first start off with an Intro to creating a Smart Notification. See Part 1 titled: “Creating an LBI Smart Notification Series – Creating an InfoSet (Part 1)”
Login into LBI (admin permission required) >> go to Tools >> Select Smart Notification
In Smart Notification, select Notifications at the top
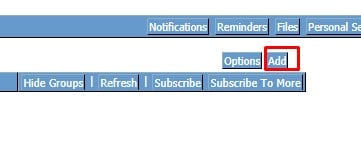
If you have none, it’ll say No Selections (see screenshot), else you’ll notice a list of existing Notifications
To create a new Smart Note, click Add
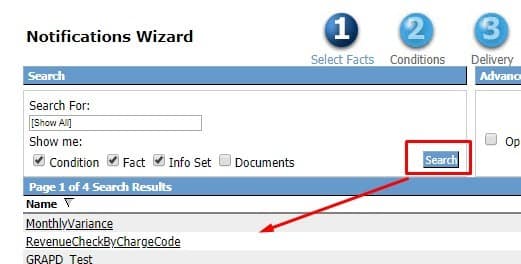
Smart Notification Wizard will pop-up and starts at step 1 (Select Facts)
The Facts section is where you would connect the dataset (or InfoSet) to the notification (this can also be a document among varios other types of data).
An InfoSet is most commonly an SQL query or stored Proc that gathers data from a database.
For this example, we will assume you have an InfoSet already created. View your InfoSets by clicking Search
For our example we will be selecting the MonlthyVariance InfoSet and then select Range
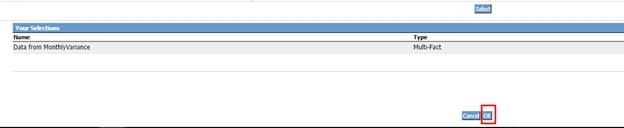
At the bottom of the next page choose Select >> Add >> Ok at the very bottom
At the bottom under My Selections you should now see your InfoSet for step 1
Now click Next or select step 2 Conditions
Conditions can be added with the Add button. This lets you tailor the data to your liking. This can also be done on the InfoSet side when writing a query or stored proc.
Click Next again or select step 3 Delivery
Delivery typically is done through the Device tab which are setup email addresses in Smart Notes (See article titled “How to setup a LBI smart note delivery device”)
The Bursting tab is the alternate method. In the Bursting tab select the InfoSet, and the column to burst on which is typically a list of email addresses.
Schedule tab is similar to Device, except on a schedule which can be set elsewhere for the Notification.
Click Next again or select Step 4 Related Info
Related Info lets you link other LBI reports, shared documents, deploy in a pre-made formatted template among other customizations. This may be covered in more depth in a future article.
Click Next again or select Step 5 Save
This is where you Name, describe, set Home Page Group for your Notification.
You can also Preview, set Status, and add additional Permissions if needed.
Click Save New Item to create your new notification and view it in the Notifications Tab.
Hope this was helpful! Good luck!
https://www.nogalis.com/wp-content/uploads/2021/11/Creating-an-LBI-Smart-Notification-Series-Creating-a-Smart-Notification-Part-2.jpg470470Angeli Mentahttps://www.nogalis.com/wp-content/uploads/2013/04/logo-with-slogan-good.pngAngeli Menta2021-11-05 07:26:272021-11-19 15:39:28Creating an LBI Smart Notification Series – Creating a Smart Notification (Part 2)