The Landmark Configuration Console allows you to effect system-wide changes with no downtime for your users.  You can personalize your Landmark applications in a multitude of ways:

  • Add custom fields
  • Move fields or remove them from forms
  • Set fields to required
  • Modify list columns (add/remove/rearrange)
  • Create new
    • User interfaces (pages, lists, etc)
    • Business classes (data, objects, etc)
  • Security
    • Use the Security Configuration tool to modify security classes, rules, and roles
  • Web Services
    • External systems communication with Landmark business classes using SOAP, HTTP, WSDL, or REST

The Infor-delivered role what will allow users to access Configuration Console is GlobalUIConfigAccess_ST.  The role that will allow users to access Security Configuration is SecurityConfigAccess_ST.

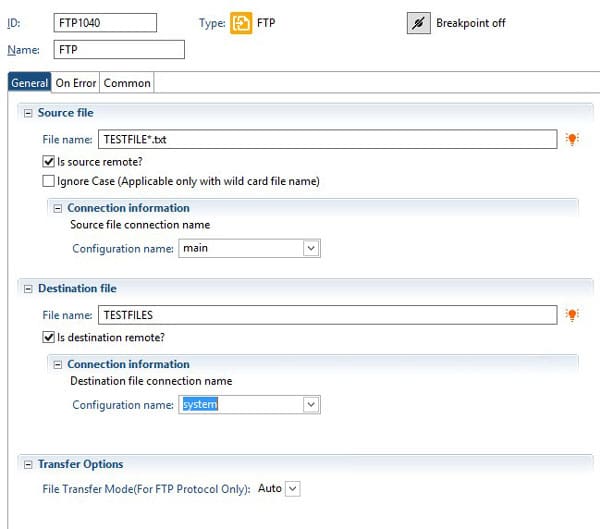
When you are using IPA to transfer files, there may be some cases where you need to pick up multiple files, or where you need to get files for which you only know a partial name (such as a file that contains a date/timestamp).  To get multiple or masked files, you can supply an asterisk (*) in the filename as a wildcard.  Then, the destination file should actually be a directory name (of a directory that exists).  All files that are picked up in the FTP process will be placed in that directory, and you can use them from there.


The Lawson database relationships are stored in the GEN database.  Foreign key constraints are not actually added to the database tables.  So, to see what these relationships are, you can query the GEN data.  The primary relationship information is stored in FILEREL.  Then, to get the fields that are used in the relationship you’ll need to join FILRELFLD and FILEINDFLD.  FILERELFLD contains the primary field names, and FILEINDFLD contains the foreign field names.  The below query is a sample run against a SQL Server database for a data area called “TEST”.


SELECT RTRIM(FILEREL.FILENAME) PARENT_FILE,

RTRIM(FILEREL.RELFILE) CHILD_FILE,

REPLACE(RTRIM(FILERELFLD.FRFLDNAME), ‘-‘, ‘_’) PARENT_FIELD,

REPLACE(RTRIM(FILEINDFLD.FLDNAME), ‘-‘, ‘_’) CHILD_FIELD

FROM FILEREL INNER JOIN

FILERELFLD ON FILERELFLD.FILENAME = FILEREL.FILENAME AND

FILERELFLD.RELNAME = FILEREL.RELNAME INNER JOIN

FILEINDFLD ON FILEINDFLD.FILENAME = FILEREL.RELNAME AND

FILEINDFLD.INDEXNAME = FILEREL.INDEXNAME AND

FILEINDFLD.FLDNBR = FILERELFLD.FLDNBR INNER JOIN

FILEDEF ON FILEDEF.FILENAME = FILEREL.FILENAME

WHERE FILERELFLD.FRFLDNAME <> ‘              ‘ AND

FILEREL.PRODUCTLINE = ‘TEST’


In Lawson v10, Admin users would have direct access to system logs but in the cloud, you’re access is limited to FTP access.

Problem: Reviewing IOS and LADB logs live is more difficult through FTP since you’re unable to download or view a file that is currently being written to. To get around this you simply use the copy line command or cp.


To understand this process, follow the steps below:

Step 1: Open LID and connect to the Lawson environment you want to access logs from.


Step 2: Go to %LAWDIR%\system directory


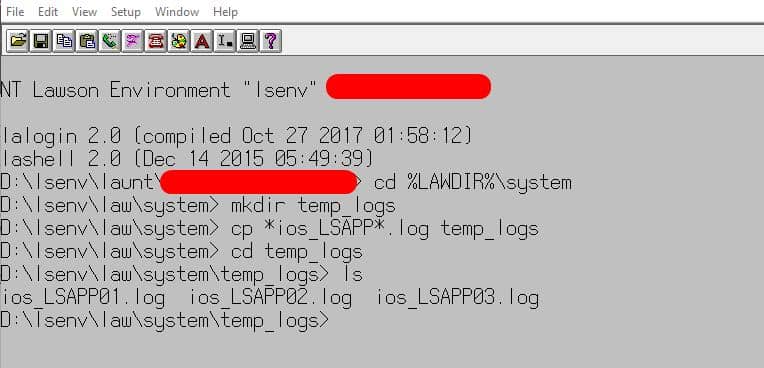
Step 3: Create a new folder in %LAWDIR%\system directory, command is: mkdir temp_logs (this will create a folder called temp_logs)


Step 4: In %LAWDIR%\system type this command (change based on your log names):

cp *ios_lsapp*.log temp_logs


Step 5: Go to %LAWDIR%\system\temp_logs and run the ls command to view your copied log files or simply download them from the FTP.


Here is a screenshot of my results:

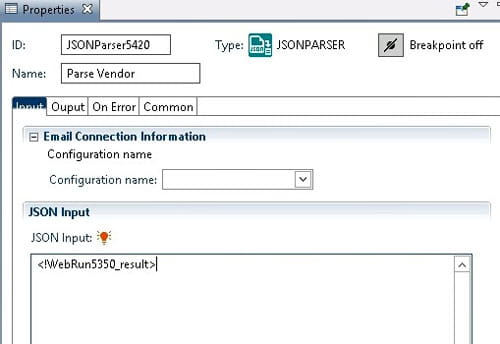
This node is used to parse a JSON response from a file or a web service call.  The input can be any JSON text, such as the result from a web service call or output from a file.

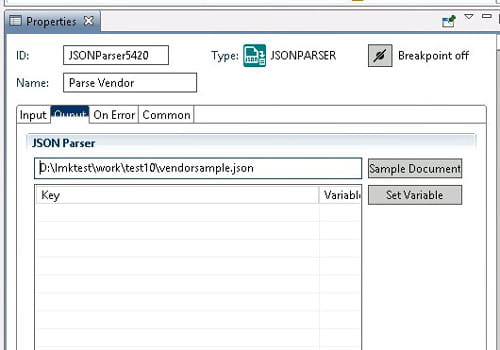
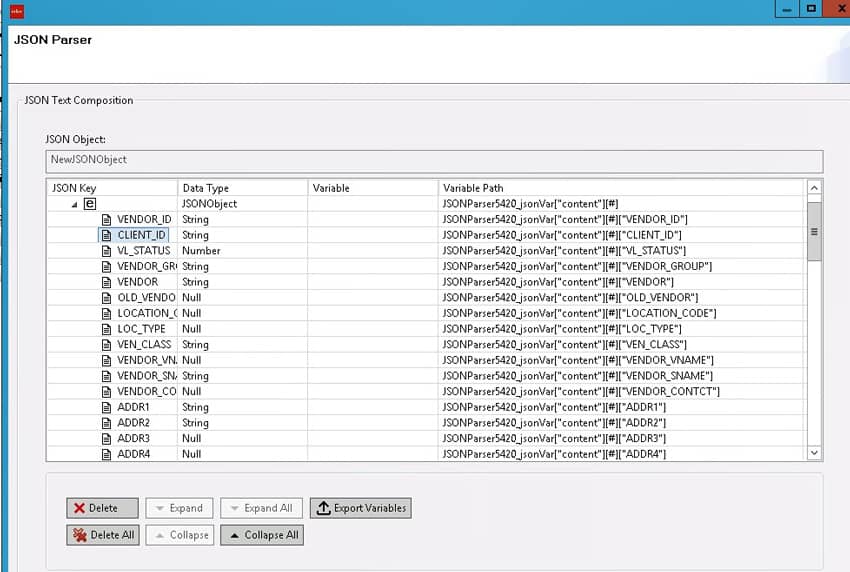
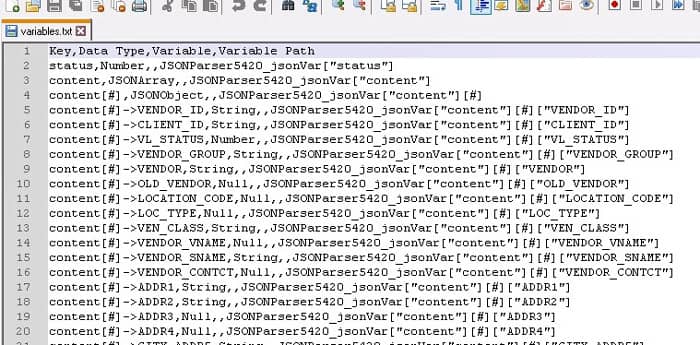
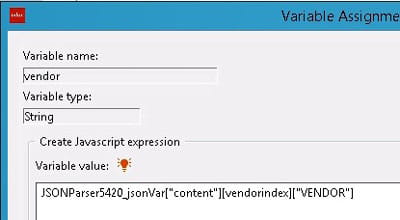
On the output tab, you can select a sample document that will help building the variable list.  When you click “Set Variable”, you can see all the variables that are available from the sample document, and you can export those variables so that they can be copy and pasted in assign nodes.

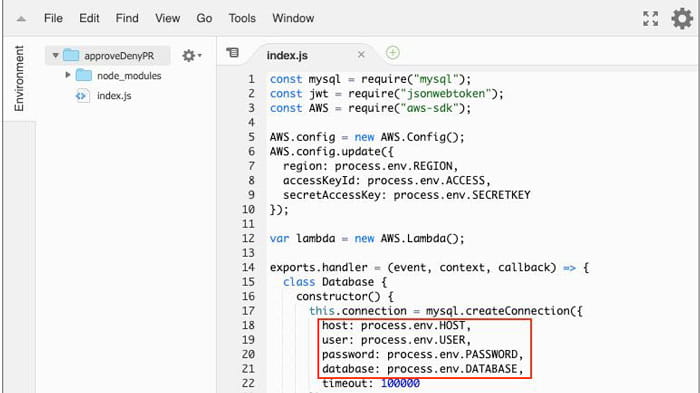
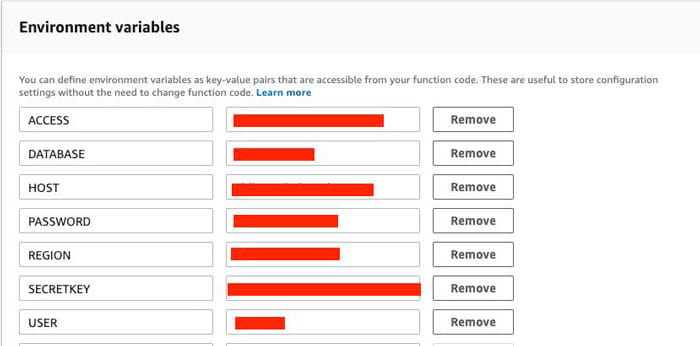
When setting up a lambda function there will most likely be secure information that you don’t want to put into your lambda functions. This is when you want to use environment variables. When declaring environment variables inside the code of your lambda function, add the string “process.env.varable_name” where “variable_name” is any string. Once you’ve declared all your environmental variables, go to your was lambda  function console, and scroll down to the environment variables section. Then add all your “variable_names” to the left side text boxes and on the right enter in the actual value of the variable. You can then, if needed, encrypt the environment variables by using the encryption configuration.

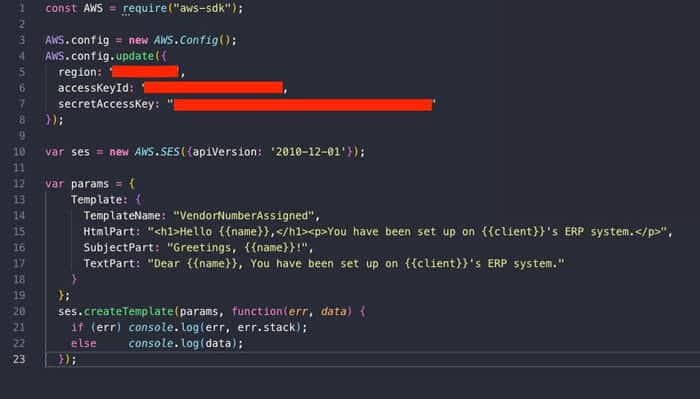
AWS has SES (Simple Email Service) which is used to help developers create notification emails. In order to use this feature, you must create a template for an email and then you can send emails. Currently, there is no way to create a template in the AWS console. One of the ways to create one is by using a Node script. You first need to have:

  1. Node installed on your computer
  2. An AWS account with access & secret keys

You will want to enter your account information where the red highlights are. Then you must add a template name (name you will be using when calling template), htmlPart (text in the email in html form), subject (the greetings), and text part (The email body that will be visible to recipients whose email clients do not display HTML).


Run the script and check if your template is in your AWS SES dashboard.

The following instructions are given that you have a lambda function created that works. AWS has API Gateway which enables developers to create RESTful API endpoints so people can call it and in turn run a lambda function. If you have never set up an API in API Gateway, you must:

  1. Log into the AWS console
  2. Search for “API Gateway” in the services tab
  3. Press “Create API”
  4. Choose REST / New API / assign a name to your api
  5. Once Created, add a resource to you api
  6. Create a method
  7. Add the created lambda function to the api resource

Once you have followed these steps the API Gateway will give you a url where you can call from your code and it will run your lambda function. One last thing you must do is to deploy the API. To do this, go to the resources tab of the API and click the Actions button and then click “Deploy”. Note that you may need to set up CORS if you want to secure your API.

If you are writing code and you want a user to manipulate data using methods you create but also don’t want the user to be able to manipulate data directly. One way you can go about this is through functional programming. Say you want to have an object that has the ability to move right and left with a starting position at 0. You might build out something like this:

const walker = {
    position = 0,
    right: function() {
        this.position++
    },
    left: function() {
        this.position–
    }
}

Then you call the function, walker.right() to move right and walker.left() to move left. However the way this is set up, a person can redefine the position variable by just directly changing it I.e. walker.position = 20. This is not good because the walker will be teleporting without ever hitting positions 1-19. So how do you stop a user from directly changing a variable that you don’t want them to change. An easy way to make this a private variable, is to make a function that return an object with only the method you want them to use. For example:

function walker() {
    let position = 0,
    return {
        right: function() {
            this.position++
        },
        left: function() {
            this.position–
        }
    }
}

const ben = walker()
ben.right()

I made a new variable called “ben” from the walker function. The way this is set up a user can no longer directly change the position property.

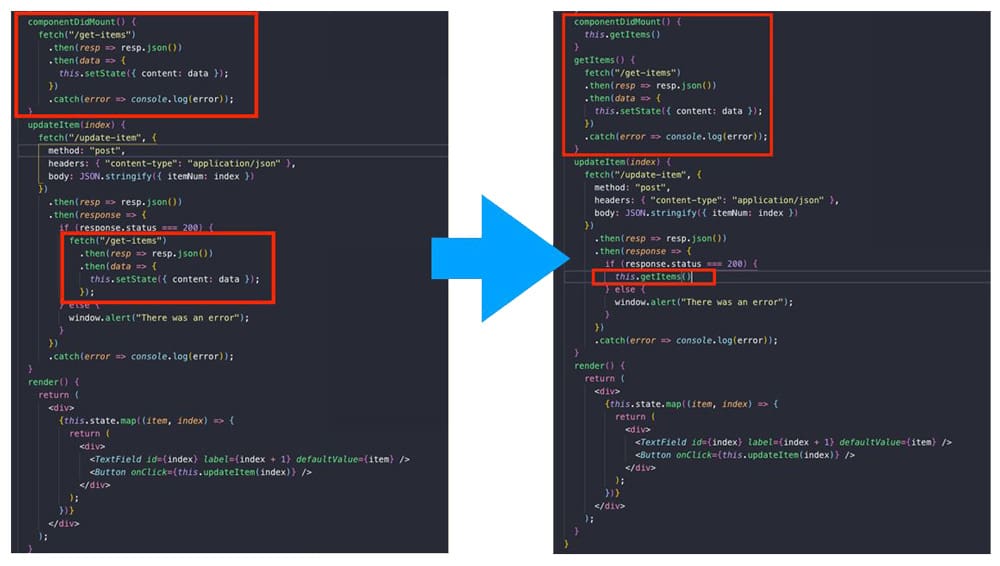
When using Reactjs, there are often times when you make a change to a database and need the updated data to be shown on the front-end. If you are taking advantage of the component did mount method to grab data once the page is mounted, you should move all of the code inside the component did mount to a new method so you can call the method once you make an update to your database. This will optimize your code since you wont be writing more code to grab the data once you make an update.