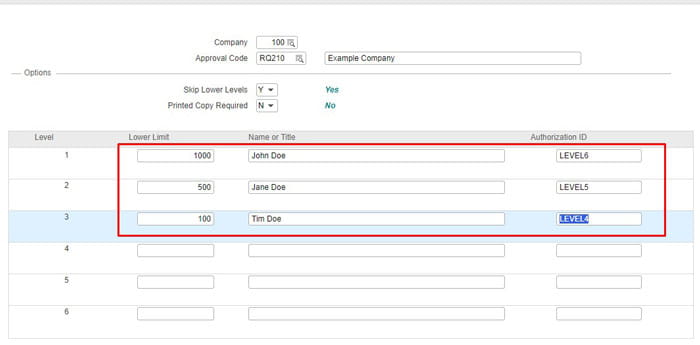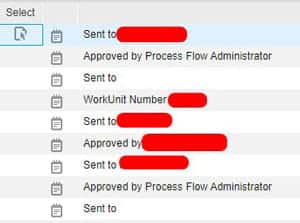
Lawson RQ02 approval strings work hand in hand with Landmark and are setup in different ways per organization. Some use general hierarchal titles and some use individual usernames. Regardless of how you implement it, you want to be able to create a report so you can update them as individuals join/leave/move around the organization
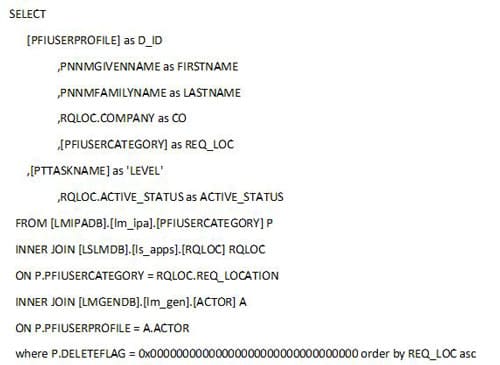
To generate a database dump of all approval strings and their levels using my method, you’ll need read access rights to the LSL database and must be using SQL.
- Login to your TEST or PROD database application.
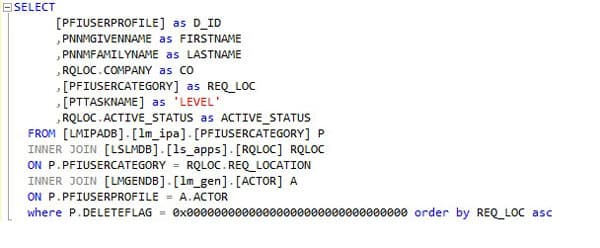
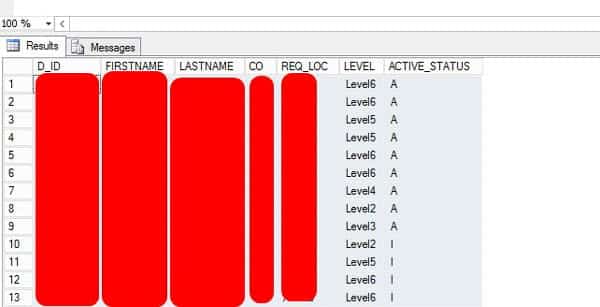
- Create a new query window and paste the below SQL code in, one is a screenshot to show syntax highlights and the other is the raw code for your convenience.


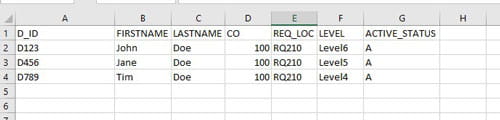
- Run the query, copy and paste with headers into Excel to filter down the data or edit the query.
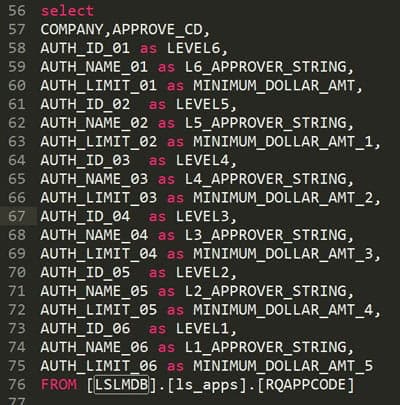
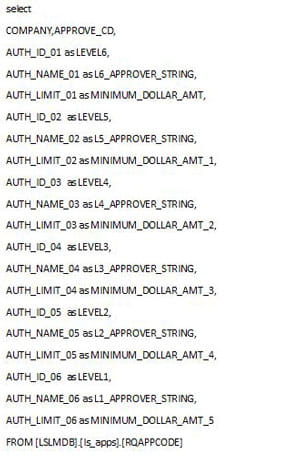
I’ve renamed various column names to reflect the different levels and dollar amounts more clearly. Feel free to change the query to your liking. This is only the RQ02 strings, to get the filters for users’ setup in Landmark, check out my article titled: “Generating a simple approval level report from the Landmark database”.