

To gain access to Infor Reporting to create and edit reports, you’ll need to make sure your organization first has the license for the software. Consult with Infor before moving forward.
Example of Infor Reporting Icon:
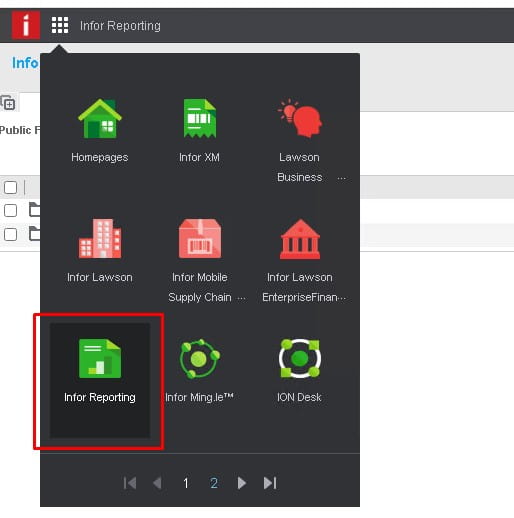
The above screenshot shows how a user may gain access to view Infor Reporting Reports. These can be reports that show Expense Reports, User Proxies, etc.
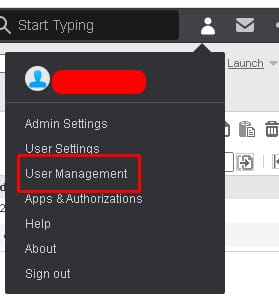
To gain access to the administration tools, you’ll need to assign these two roles:
XM-AdvancedBusinessAuthor – Allows access to canned templates (example reports to build off of)
XM-ProfessionalAuthor – Allows freeform access to create new and edit existing reports.
These roles must be assigned in Mingle under user management tab
Good luck!

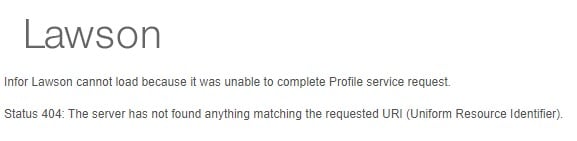
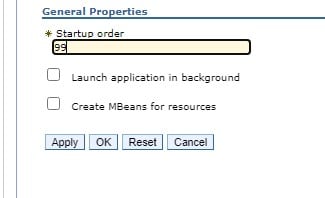
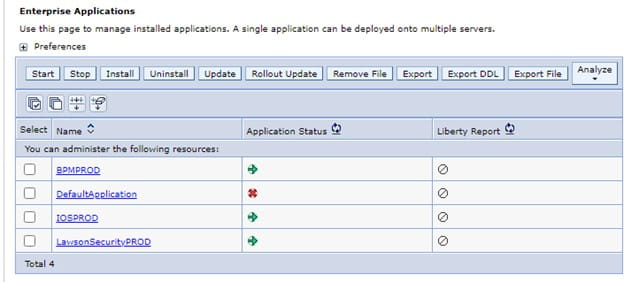
If you receive the error message in Lawson Portal “The Server has not found anything matching the requested URI”, check the WebSphere SystemOut.log for the message “Failed to load webapp: context root /* is already bound.” This means that one of your WAS applications (most likely the default app) is configured to start before the Lawson IOS application. To fix this, either delete the Default Application, or configure its startup behavior. Go to WAS Console > Applications > Enterprise Applications. Click on the Default Application then “Startup behavior.” Change the startup order to some larger number so the Default Application will attempt to start last in the order. Save the changes and synchronize the nodes. Then, start your IOS application.


If you have several files in the LAWDIR/productline/work directory that are taking up a lot of space and need to clean them up, most can be deleted, but be aware that the files with UPPERCASE file names are often used to transfer data to non-Lawson systems or ACH bank files, and they may be waiting to be used by a future process that has not run yet.
The following procedure is to clean up print files, work files, RQC files, user home directory files, and WebSphere trace and dump files by either running a program or by defining a recurring job that calls the program.
Automated Cleanup of Print Files, Work Files, and Other Files
Use this procedure to clean up print files, work files, RQC files, user home directory files, and WebSphere trace and dump files by either running a program or by defining a recurring job that calls the program. Before running the program or the recurring job, you must set up configuration files. These files enable you to set the cleanup options, exclude specific files from the cleanup process (by file name or by the user name associated with the files), and to specify date ranges for the files to be deleted.
The types of files to be deleted include:
To clean up print files, work files, RQC files, and other files:
You can edit the parameters in the prtwrkcleanup.cfg file in two ways:
This configuration file is divided into multiple sections:
The script uses each different section for a different cleanup job. Make sure to put usernames in the right sections to avoid undesired outcomes.
You can enter multiple usernames in either a comma-separated format or a line-break-separated format.
For example:
Username1,Username2,Username3…
Or
Username1
Username2
Username3
Note: Do not remove the section dividers.
Use this file to specify a list of file names to be excluded from the work file cleanup process.
You can enter multiple file names in either a comma-separated format or a line-break-separated format.
For example:
Filename1,Filename2,Filename3…
Or
Filename1
Filename2
Filename3
prtwrkcln.exe
Job Name
Specify a name for the multi-step job.
Job Description
Specify a description for the multi-step job.
User Name
Displays the name of the user defining the job.
Form
Specify prtwrkcln. (This assumes this form ID exists. Use the For ID Definition utility (tokendef) to check if it exists and to add it as an environment form ID if necessary.)
Step Description
Specify a description for the step.
If you have several files in the LAWDIR/productline/work directory that are taking up a lot of space and need to clean them up, most can be deleted, but be aware that the files with UPPERCASE file names are often used to transfer data to non-Lawson systems or ACH bank files, and they may be waiting to be used by a future process that has not run yet.
The following procedure is to clean up print files, work files, RQC files, user home directory files, and WebSphere trace and dump files by either running a program or by defining a recurring job that calls the program.
Automated Cleanup of Print Files, Work Files, and Other Files
Use this procedure to clean up print files, work files, RQC files, user home directory files, and WebSphere trace and dump files by either running a program or by defining a recurring job that calls the program. Before running the program or the recurring job, you must set up configuration files. These files enable you to set the cleanup options, exclude specific files from the cleanup process (by file name or by the user name associated with the files), and to specify date ranges for the files to be deleted.
The types of files to be deleted include:
To clean up print files, work files, RQC files, and other files:
You can edit the parameters in the prtwrkcleanup.cfg file in two ways:
This configuration file is divided into multiple sections:
The script uses each different section for a different cleanup job. Make sure to put usernames in the right sections to avoid undesired outcomes.
You can enter multiple usernames in either a comma-separated format or a line-break-separated format.
For example:
Username1,Username2,Username3…
Or
Username1
Username2
Username3
Note: Do not remove the section dividers.
Use this file to specify a list of file names to be excluded from the work file cleanup process.
You can enter multiple file names in either a comma-separated format or a line-break-separated format.
For example:
Filename1,Filename2,Filename3…
Or
Filename1
Filename2
Filename3
prtwrkcln.
Job Name
Specify a name for the multi-step job.
Job Description
Specify a description for the multi-step job.
User Name
Displays the name of the user defining the job.
Form
Specify prtwrkcln. (This assumes this form ID exists. Use the For ID Definition utility (tokendef) to check if it exists and to add it as an environment form ID if necessary.)
Step Description
Specify a description for the step.
Problem:
How do I delete or clear out the IBM WebSphere Application Server (WAS) temporary directories and cached files?
Summary:
This guide explains the process of removing or erasing the temporary directories and cached files in IBM WebSphere Application Server (WAS). It includes the appropriate situations for performing this task, the intended users, and the step-by-step instructions.
When is it necessary to perform this action?
If you encounter issues where the deployment manager, nodeagent, or application server fails to start, you can attempt the following steps. However, unless specifically requested by a support analyst, there is no need to carry out these actions.
Who should carry out this task?
System Administrators are responsible for executing these steps.
How is this done?
Follow the instructions below for each profile located within WAS_HOME/profiles (including Dmgr01 and AppSrv01, or whichever name your application server profile has).
Good luck!
Description:
To resolve the error message, “Restart the Server Express License Manager or License Manager is corrupt.” The errors are listed as compile error messages 191, 192, and 197, follow the troubleshooting steps outlined below.
Enter the command ps -ef|grep mfl to see if your License Manager is running. If the License Manager isn’t running, start it. If the License Manager is running, kill and re-start it by moving to the mflmf directory and entering the command sh ./mflmman.
If the license database is corrupt, go to the License Manager directory. (Note: The License Manager directory is the location where the license was installed.) Remove the following four files from the mflmf directory: mflmfdb, mflmfdb.idx, mflmfdbX, and mflmfdbX.idx. After these files have been removed, run License Administration Services (mflmadm) and re-install the licenses.
Follow these steps if you want to add or re-add developer licenses:
Use the cd command to move to the directory where License Manager was installed.
Execute the mflmadm program by entering the command ./mflmadm.
Press F3 (Install) to install the ServerExpress and/or the MicroFocus Cobol license.
When prompted, enter your key and serial number. ( Note: You must hit the slash ( / ) key twice.) Press Enter to save your key and serial number.
Press F3 (Install) to install and F7 (Refresh) to refresh. Press F5 (Browse) to see your ServerExpress license. Press F6 (More) to see both your ServerExpress and MicroFocus Cobol licenses.
Start the License Manager by going to the mflmf directory and entering the command sh ./mflmman. To verify that the License Manager is running, enter the command ps -ef|grep mfl. (If the License Manager is running, a root mflm_manager process should be returned.)
If the License Manager is still corrupt, remove the entire mflmf directory and use the cd command to move into the $COBDIR/lmf directory. Run lmfinstall. Select just the ServerExpress install option. You can either enter your developer serial number and license during this ServerExpress install OR you can enter them after the install has completed.
Follow these steps if you want to enter your developer serial number and license after your ServerExpress install is complete:
Use the cd command to move to the mflmf directory.
Run ./mflmadm.
Press F3 (Install) to install, and add your serial and license number.
Press F3 (Install) again.
Press F7 (Refresh) to refresh.
Verify that the License Manager is running by entering the command ps -ef|grep mfl. If the License Manager is running, a root mflm_manager process should be returned. If the License Manager isn’t running, move to the mflmf directory and run the command sh ./mflmman to start your License Manager.

If you have several files in the LAWDIR/productline/work directory that are taking up a lot of space and need to clean them up, most can be deleted, but be aware that the files with UPPERCASE file names are often used to transfer data to non-Lawson systems or ACH bank files, and they may be waiting to be used by a future process that has not run yet.
The following procedure is to clean up print files, work files, RQC files, user home directory files, and WebSphere trace and dump files by either running a program or by defining a recurring job that calls the program.
Use this procedure to clean up print files, work files, RQC files, user home directory files, and WebSphere trace and dump files by either running a program or by defining a recurring job that calls the program. Before running the program or the recurring job, you must set up configuration files. These files enable you to set the cleanup options, exclude specific files from the cleanup process (by file name or by the user name associated with the files), and to specify date ranges for the files to be deleted.
The types of files to be deleted include:
To clean up print files, work files, RQC files, and other files:
You can edit the parameters in the prtwrkcleanup.cfg file in two ways:
This configuration file is divided into multiple sections:
The script uses each different section for a different cleanup job. Make sure to put usernames in the right sections to avoid undesired outcomes.
You can enter multiple usernames in either a comma-separated format or a line-break-separated format.
For example:
Username1,Username2,Username3…
Or
Username1
Username2
Username3
Note: Do not remove the section dividers.
Use this file to specify a list of file names to be excluded from the work file cleanup process.
You can enter multiple file names in either a comma-separated format or a line-break-separated format.
For example:
Filename1,Filename2,Filename3…
Or
Filename1
Filename2
Filename3
prtwrkcln.
Job Name
Specify a name for the multi-step job.
Job Description
Specify a description for the multi-step job.
User Name
Displays the name of the user defining the job.
Form
Specify prtwrkcln. (This assumes this form ID exists. Use the For ID Definition utility (tokendef) to check if it exists and to add it as an environment form ID if necessary.)
Step Description
Specify a description for the step.

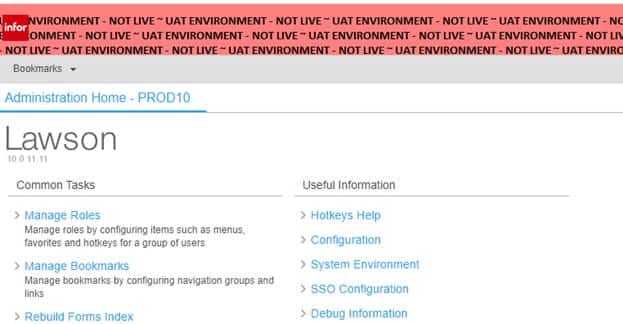
Customizing the Lawson Ribbon can be a good idea for giving users a visual cue about which environment they are working in (see screenshot below).
Customizing the ribbon is as simple as changing one line of html code. To update the ribbon image, you will need to open up the index.htm file at WEBDIR/lawson/portal/. Next, navigate to the “topBanner” element and add a background image (you can use the “find” function to search for this faster if needed), setting the URL to the path where you saved your image (see below).
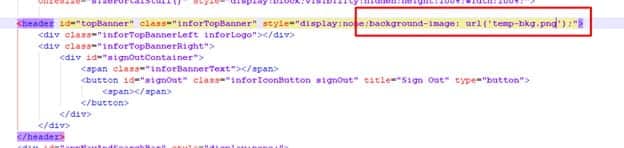
Save your changes and your ribbon will now be a custom view!