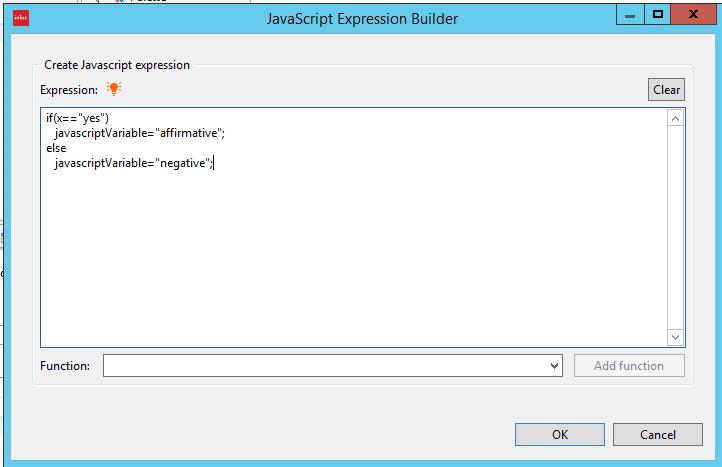
There may be a time where you need to update your WebSphere profile to use a later version of Java. One indication of this would be if you are installing an app in WebSphere, and you come across the error “The major.minor version ‘51.0’ is too recent for this tool to understand.” This means that your application expects a newer Java SDK.
To determine which SDK your application is currently using,
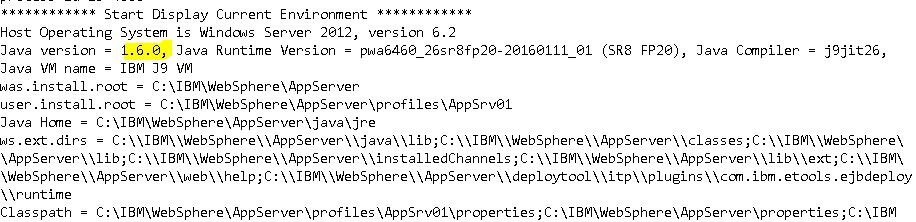
- Open <WAS_HOME>/profiles/<profile>/logs/startServer.log
- Find the last server start entry
- Make not of the Java version
To update the SDK used by your WebSphere profile,
- Open a command prompt as administrator
- Navigate to <WAS_HOME>/profiles/<profile>/bin
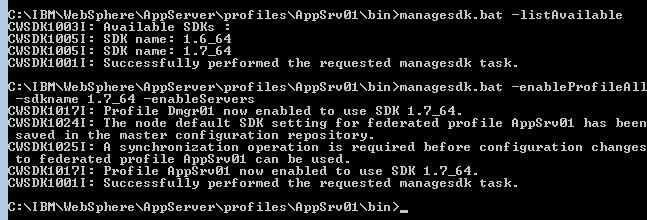
- Type bat –listAvailable (managesdk.sh for Unix) to list the Java SDKs that are available for this profile (note the name of the SDK that you want to use)
- Type bat –enableProfileAll –sdkname <the name you noted earlier> -enableServers
- Syncrhonize the WebSphere nodes
- Restart the WebSphere application server
- Check the startServer.log to see that the java version has changed
For example:

WebSphere Application Server, update java sdk version, The major.minor version ‘51.0’ is too recent for this tool to understand