
Before:
![]()
After:
![]()

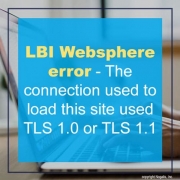
You may be getting reports from your users of this security warning or if loading to LBI from a portal bookmark, users may receive the below embedded error:

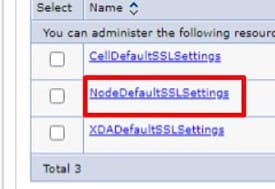
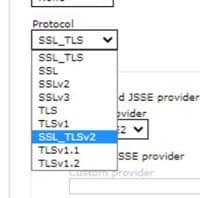
Clear your browser cache before accessing LBI again and the TLS 1.0/1.1 error should be resolved. Also access LBI directly from a portal bookmark to see if it works there too.
Good luck!

You may have saw our article “How to load bursting rights into Lawson Business Intelligence” and encountered an error that your CSV file “exceeds the limit”.
To resolve this:


Good luck!


We provide several customers with our MSP services in Lawson and often are switching between several VPNs throughout the day. Our VPNs are fairly reliable but every once in a while, they fail to connect and only a reboot seems to resolve. Unfortunately, this means closing all of our current tasks and documents that are open and essentially stepping out of our work flow.
Follow these steps below to resolve your CISCO VPN connection issue:
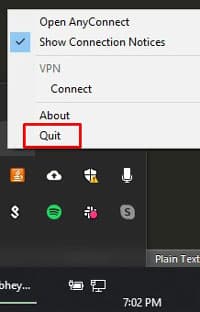
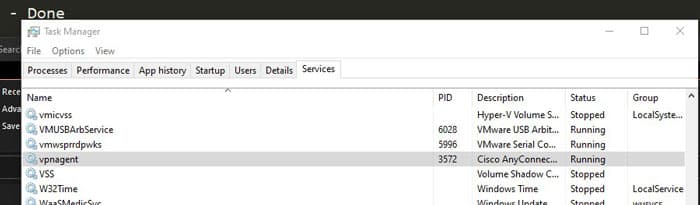
If you’re still having issues, it may be the VPN server you’re connecting to in which you’ll have to reach out to a dedicated Windows team for that client. Good luck!

You have ADFS setup on your server but addins is not working though the user is setup in Lawson with the proper security and addins flag enabled.
Steps to resolve:
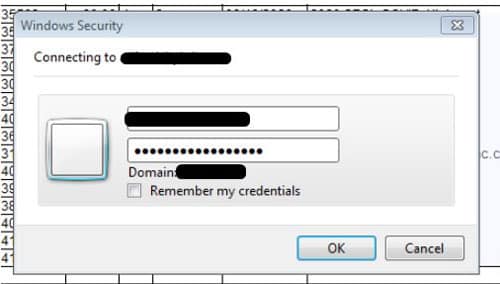
TIP: The password for the thick client identity can be anything. As long as it is filled, it should allow ADFS to authenticate with addins. Good luck!