Error occurring: Batch Job failed: execjob(laStartProcess): Unable to log in Domain\user
What’s happening before this error:
When logged in as the lawson user and running a user defined batch job (defined within tokendef) which calls the importdb command. In our example, we run importdb as the command but this can happen for any user defined token that either runs a command or a script such as a perl script or bat file, etc.
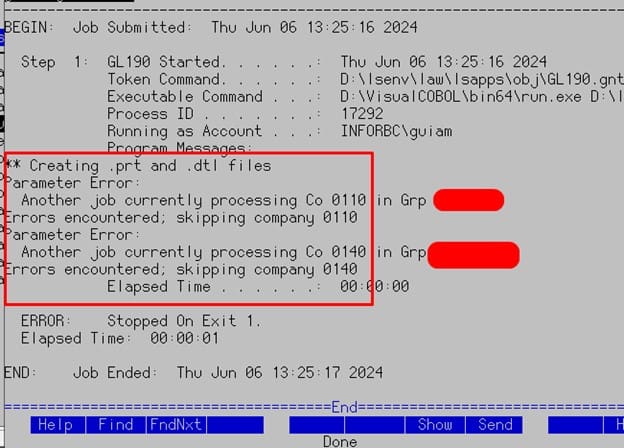
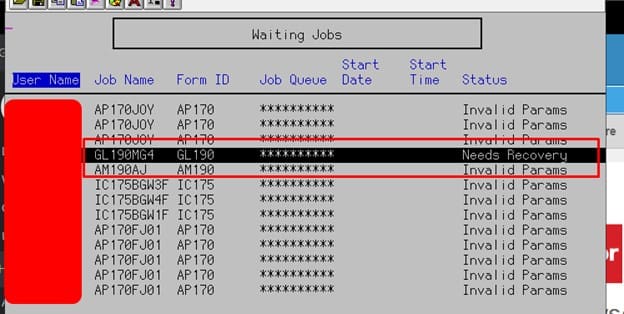
This is an example of an log text (joblog) with this error in it:
User: domain\UserName Job: JobNameHere Queue:
BEGIN: Job Submitted: Tue Jan 13 15:51:36 2020
Step 1: importdb Started . . . .: Tue Jan 13 15:51:36 2020
Token Command. . . . . .: CommandNameHere
execjob(laStartProcess): Unable to log in domain\UserName
StartStep failed: The operation completed successfully.
Elapsed Time: 00:00:01
END: Job Ended: Tue Jan 13 15:51:37 2020
How can this issue be resolved?
These steps are for experienced “Lawson” security admins (Nogalis provides Managed Service support if needed):
INFOR Single Tenant CLOUDSUITE CUSTOMERS ONLY:
If you are an Infor Single Tenant CloudSuite customer running the Infor Lawson products, if you do not know the user’s INFORBC account password, you need to do the following:
- Go to the CloudSuite Self Service Portal:
https://concierge.infor.com/ then find and select the cloudsuite app (open an infor ticket if you don’t have it)
- You will go under service requests, choose the password change option. Change the password for this user that is having the issue.
- After that is done, have the user test running the script again.
For all On-Premises customers or CloudSuite customers that do know their INFORBC account password:
IMPORTANT As of Oct of 2020, Infor found a bug in the ISS User interface (/scwebadminapp) that when changing just the password, the UID value for the user would be changed and cause the user to no longer see their jobs and reports. JT-1492340. The fix for that requires a combination of ISS version 11.0.9.1627 and then the LSF version needs to be one of the following:
– 10.0.9.2 or higher
– 10.0.10.3 or higher
– 10.0.11.5 or higher
If you are on the proper versions, you can use ISS to make the change to the password, if you are not on the proper versions, you should only do the update via the LSA tool in the steps below.
Use the Infor Security Service (ISS) web page (context root is usually /scwebadminapp) if your Lawson System Foundation (LSF) environment is federated with Landmark. Alternately, if you are not federated (uncommon) then log into the Lawson Security Administrator (LSA). If you’re not sure if you are federated with Landmark you should review your LAWDIR/system/lsservice.properties file to check for fed. lines as well as this line; isprimary=true . If these are present, then you are federated.
- Search for the user for whom the batch job failed.
- Navigate to Manage Identities
- Click on the environment identity from the list of Services on the left of the ISS web page or the screen in LSA
- That password must be the actual user’s domain (Windows customers) or (Unix, IBM i – OS user) password in order to use user tokens/scripts. Double click within the ‘password and ‘password confirm’ attributes to type (DO NOT USE COPY and PASTE) in the correct domain password for this user. Save the change in ISS by clicking on the “Diskette”/save icon or, if you are in the LSA tool, choose Edit then Change.
IMPORTANT: DO NOT DELETE AND RE-ADD THE USER’S ENVIRONMENT IDENTITY OR THEY WILL NO LONGER BE ABLE TO SEE THEIR JOBS AND REPORTS IN THIS ENVIRONMENT.
Good luck and again, if you need experienced Lawson Security Admins to complete this task, reach out to us at https://www.nogalis.com/