Tips & Tricks in Configuration Console (Supporting Article)
Introduction
Infor’s Configuration Console is a tool that can be used to configure Landmark applications. It can be used to create new user interface components, or customize existing user interface components. It is a very useful tool for customizing and enhancing the user experience in Landmark applications. The tool uses a proprietary language called “Landmark Pattern Language” (LPL).
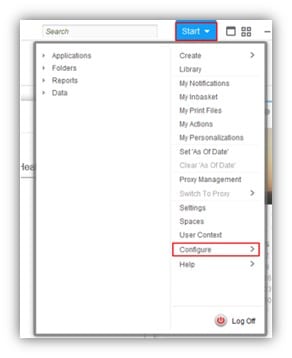
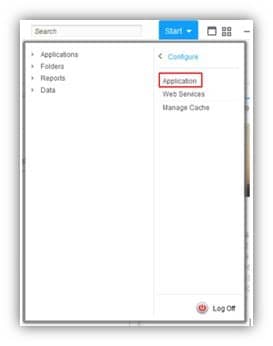
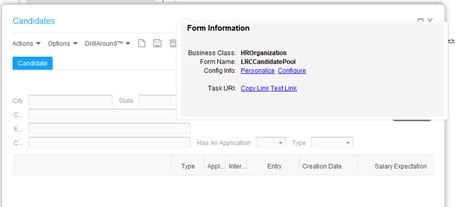
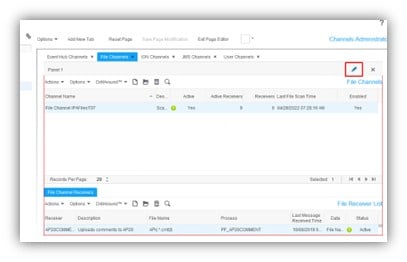
To get to the Configuration Console in Rich Client, go to Start > Configure > Application. Or, you can ctrl+shift+click on a Landmark form and click the “Configure” link.
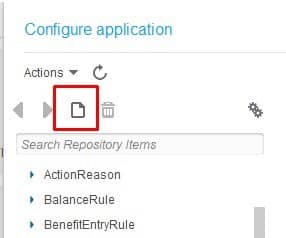
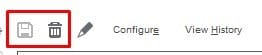
The “empty sheet” button is used throughout Landmark applications to create a new item. Configuration Console is no exception. Press this button to create a new configuration. The save and delete buttons are also intuitive. When you click the delete button, remember you are deleting the configuration only, not the Infor-delivered component!
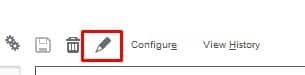

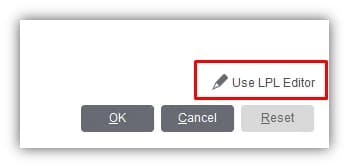
In most cases, the “pencil” button indicates editing the configuration LPL directly, and the “Configure” button is for editing the component using a graphical interface.
Menus
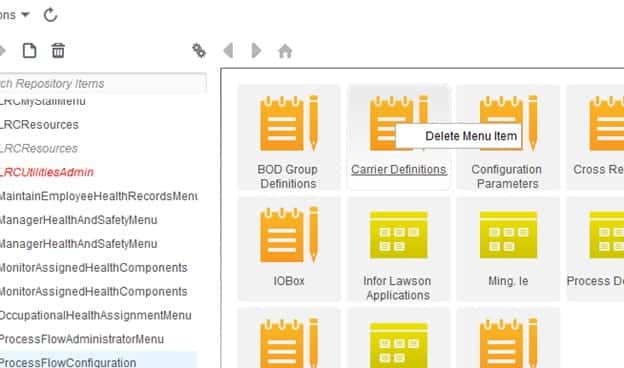
Configuring menus is pretty straightforward. Menu items can be deleted, and menus can be hidden from user view. Note that if a menu is hidden in Configuration Console, this setting takes precedence. So, if the menu is available via security, it still can’t be viewed.
Pages
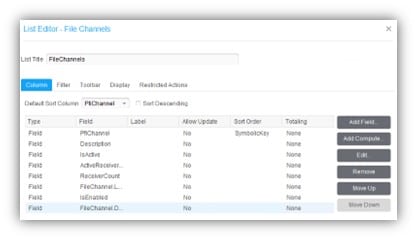
There are a few options available in configuring pages. Mostly you can add different fields, including computed fields. This is one example where the pencil button does not indicate LPL configuration. On the main configuration screen for a page, the pencil button takes you into the page editor. At the bottom of that screen, you will have to option to edit the LPL code.
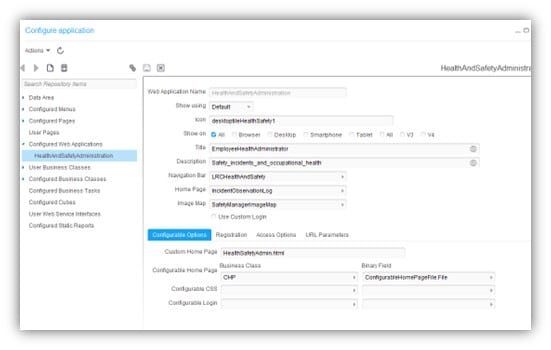
Web Applications
Web Applications have a few options for configuration. One thing that can be customized is the home landing page for the web application. Just make sure the page exists in the correct location on your server!
User Fields
User Fields are probably one of the most widely-used configurations available. The value in a User Field will be saved in the database, so that it can be accessed later in Landmark queries or Spreadsheet Designer. There are several types of fields available to allow you much flexibility in form customization.
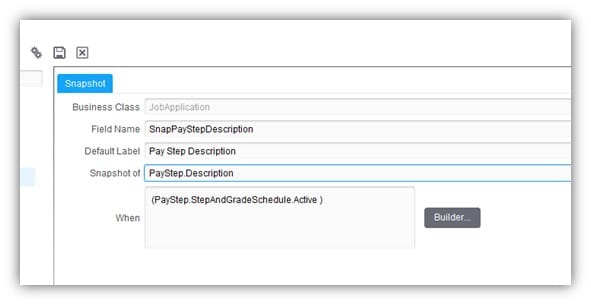
A snapshot is sort of what it sounds like. It is a copy or a “snapshot” of another field from a related business class.
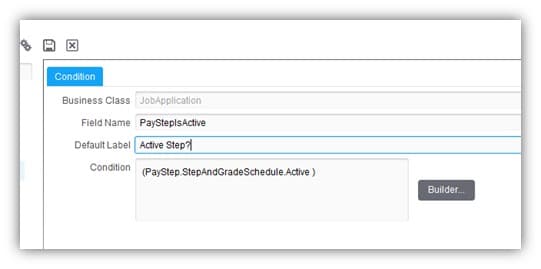
A condition field is a way to test a condition without having to rewrite code over & over. A condition field should always return true or false.
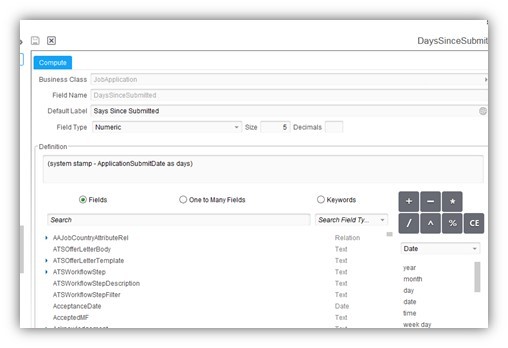
A compute fields allows you to do mathematical and date computations on one or more fields in the business class.
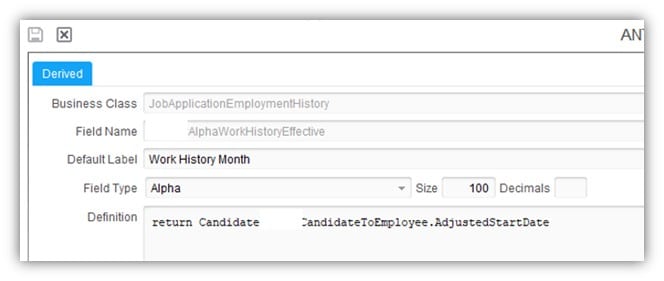
Derived fields are the most flexible option, and can be used in place of all of the above field types. They can be used to convert data types, take substrings, or write more complex bits of code to return the desired information.
Forms
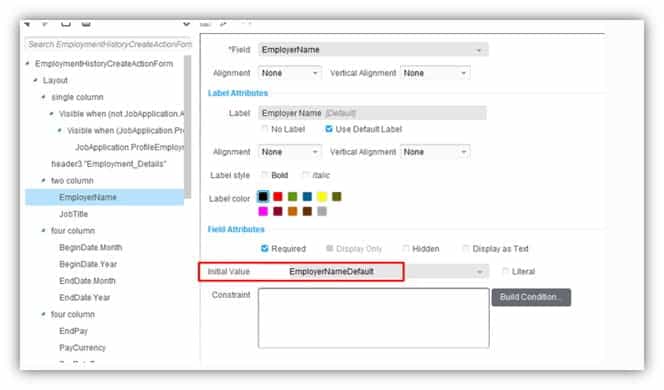
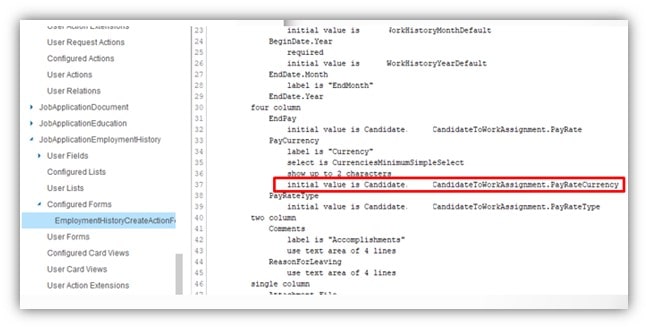
Forms are another highly configurable component. User Fields can be added to forms. Fields can be hidden, actions can be disabled, and basic checks can be done to customize the flow of a form. Here are some examples for setting default values on a Form.
Relations
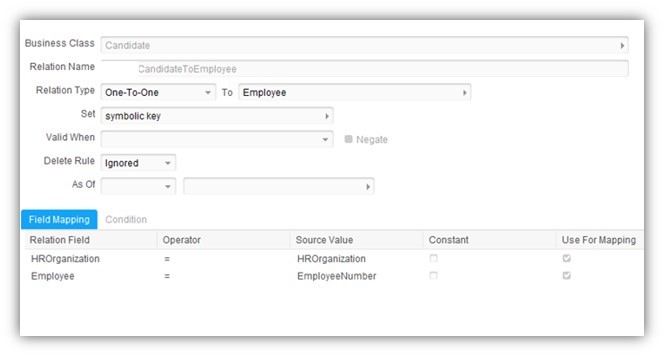
Relations are another very useful tool in the Configuration Console arsenal. They can really open up your forms and other components to allow you to get data from other areas in the application that isn’t readily available. Relations are a way of relating two business classes on key fields. A one-to-one relationship requires all of the key fields to be populated. A one-to-many relationship does not, but be aware that this could return a list of values instead of one value!
These are examples of relating the Candidate business class to the Employee an WorkAssignment business classes.

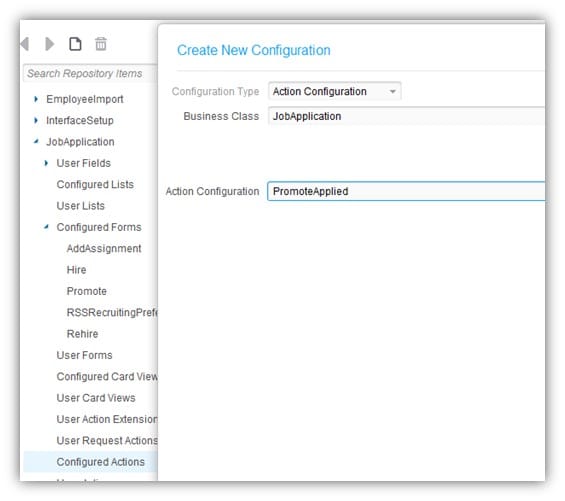
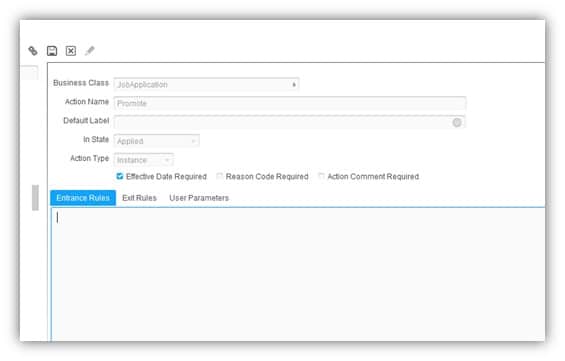
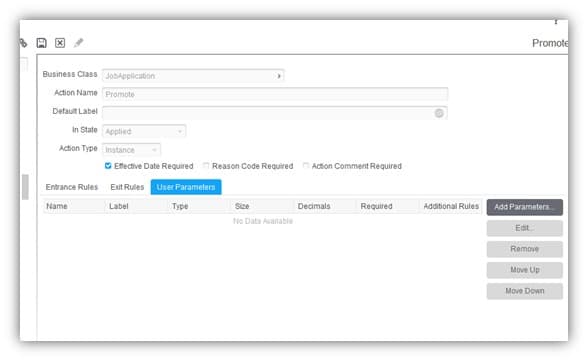
Actions
Actions can be configured with Entrance Rules (things that happen when the action loads), Exit Rules (things that happen when the action is released), and User Parameters. The User Parameters would follow the action into the next step, such as an IPA approval flow. Some of the fields on an action can be configured to be required, or not required.
History
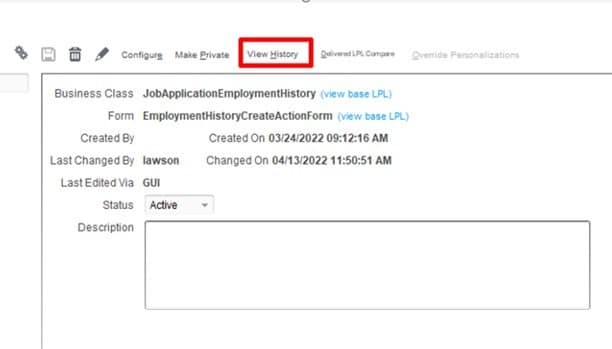
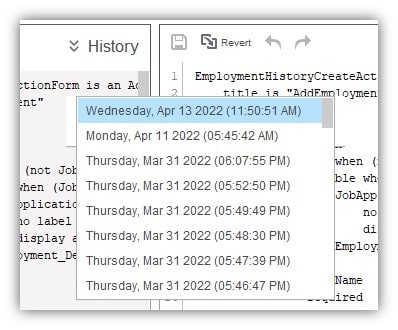
All configuration changes are version and stored each time the configuration is saved. This means that you can compare current state to any of the previous states to the beginning of the configuration, as well as the base LPL. This is highly useful, and a great feature! To get to the history, on the main page of any component, select “Vew History”. On the left side is the historical configuration. On the right side is present-day. You can click the dropdown to select the configuration you want to compare. If you are ready to go back to that configuration, click the “revert” button. If you are satisfied, don’t forget to save your changes!
Helpful Links
Infor’s documentation site is a great jumping-off point for learning about Configuration Console and LPL.
- https://docs.infor.com/lmrk/2022.x/en-us/lmrkolh/default.html?helpcontent=lmrkccwug/cover.html
- https://docs.infor.com/lmrk/2022.x/en-us/lmrkolh/default.html?helpcontent=lmrkccug_cl/cover.html
- https://docs.infor.com/lmrk/2022.x/en-us/lmrkolh/default.html?helpcontent=lmrklpltg/cover.html
Also, check out the webinar that our very own Sr Technical Consultant Desi hosted on this topic!

