
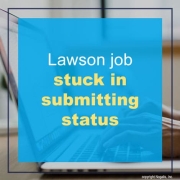
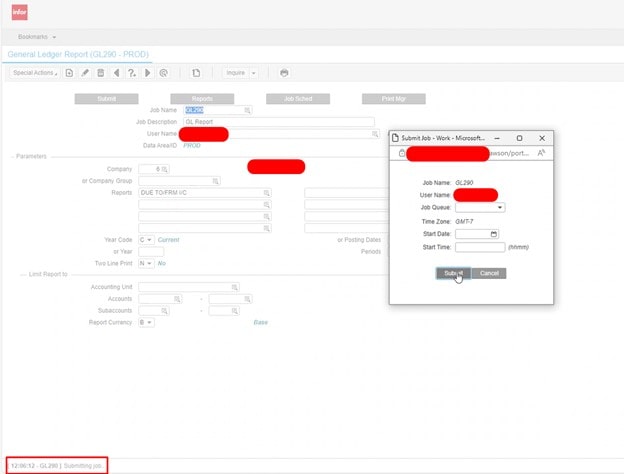
Is your Lawson job stuck in a submitting status after clicking submit multiple times as shown below?
This commonly happens when a user returns to an organization and their access is restored or another users lawson jobs are copied over to this user. These jobs have been updated from CTPs or patches and may have old or corrupt parameters.
Resolution 1:
Try and simply create a new job in Lawson (deleting the old) and try submitting again. This is assuming the user’s security and identity are already setup correctly.
Resolution 2:
If the above doesn’t resolve the issue, the cause of the issue can occur when the users DOMAIN Identity is corrupt or out of sync in LDAP. This is the domain identity that controls the print directory found in “Managed Identities” when viewing a user in Lawson Security.
First backup the users print directory and do a jobdump command in LID to copy their jobs. The delete and re-add this DOMAIN identity to see if it resolves the issue.
If it doesn’t, you’ll need to delete the user completely and re-add them into Lawson. This can be done with the Lawson Security Admin tool. You can also download Jxplorer and see if LDAP is holding onto the identity (backup LDAP before editing/deleting any identities in Jxplorer).
Good luck!
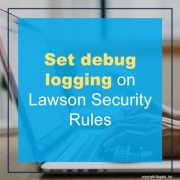
Follow the steps below to set debug logging on Lawson Security Rules.
Launch Lawson Security Administrator (LSA).
Select Server Management.
Select Server.
Select the Auditing + Logging tab.
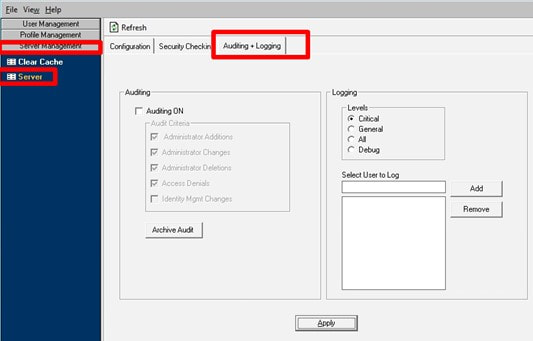
Under Logging Levels on the right, click Debug.
Under the Select User to Log section type in the RMId of a user who should be logged.
Additionally, under the Select User to Log section type ALL in upper case*.
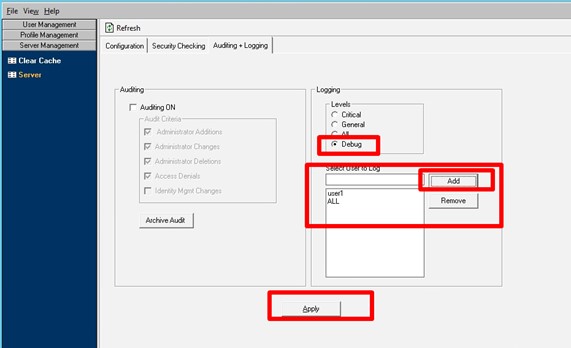
Click Apply.
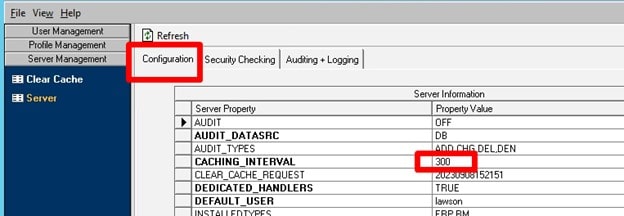
After the security Caching Interval time is reached then perform the same action you need to troubleshoot. Note the date/time you perform the action.
Collect the logs: On the Lawson server, the name and location of the log files are: LAWDIR/system/lase_server_*_*.log and ios.log and ios.log(x).
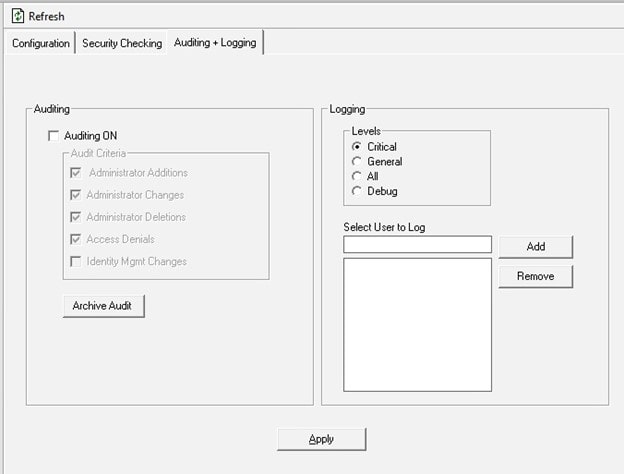
To disable the debug logging in LSA, go back to the Auditing + Logging tab. Change the Logging Levels to Critical and highlight the RMId you added and click Remove, then highlight ALL and click Remove.
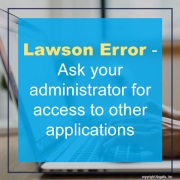
A user logs into Infor OS or Lawson Mingle, clicks the waffle icon in the top left and encounters the below error:
“If you’re seeing this, ask your administrator to give you access to other applications”
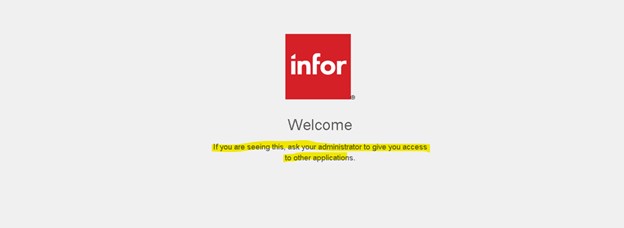
Resolution 1 (Requires a Lawson Administrator):
Verify if the IFSSecurityRole has been assigned to the Application:
On the Permission screen, you should see the IFSSecurityRoles configured for the application.
To grant permission to the user for the application, ensure that at least one of the listed IFSSecurityRoles is assigned to them.
Resolution 2 (Requires a Lawson Administrator):
Provide User Permission:
Have the user sign out and sign back in to Infor OS after the change.
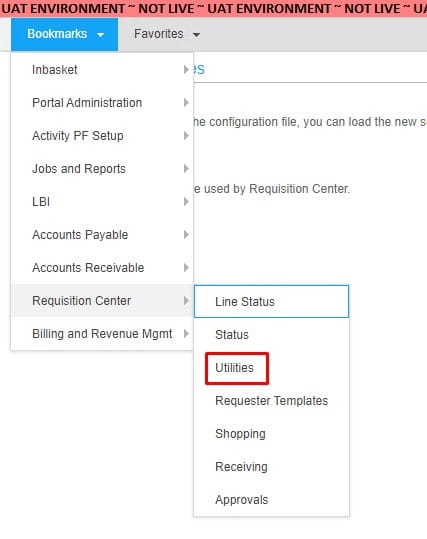
If you make changes to the rqc_config.xml file, you will need to deploy the changes to RQC. Luckily, this is a simple change.
To update or make changes to RQC, follow these steps:
Either go to http(s):/<lawson server>:<port>/rqc/html/utility.htm
OR
Open Lawson portal and navigate to Bookmarks > Requisition Center > Utilities. They both will lead you to the next screen where you will have a couple options.
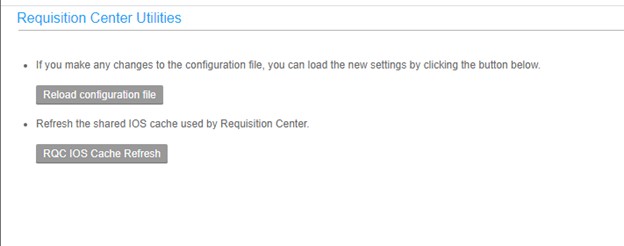
By clicking “Reload Configuration File”, this will deploy your changes to rqc_config.xml. And by clicking “RQC IOS Cache Refresh”, this will refresh the RQC cache. See the screenshots below for reference. Your rqc_config.xml file is now successfully updated.

Given Microsoft’s discontinuation of support for Internet Explorer, which is required for report creation, editing, and saving in Infor Reporting, an alternative browser setup is essential. Here’s a step-by-step guide for configuring Microsoft Edge to operate in Internet Explorer mode for Infor Reporting. Ensure to follow these steps carefully:
As of 7/7/2022
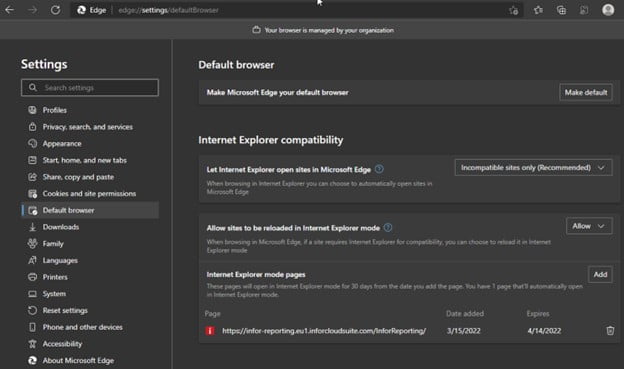
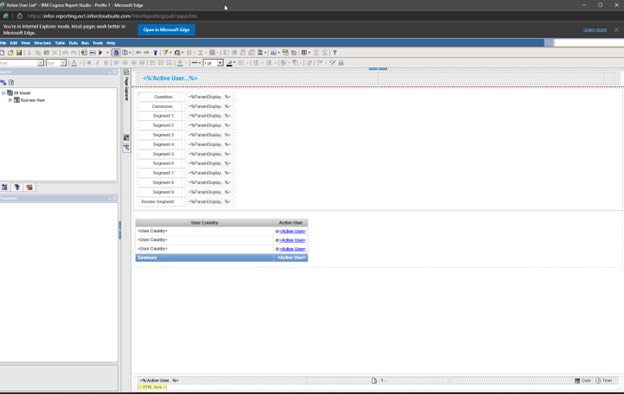
For MT Cloud Environments via Ming.le
To make Infor Reporting function properly through Ming.le, an additional step is needed:
Example:
By default, URLs added in the “Internet Explorer mode pages” menu will expire after 30 days and must be re-added. You can change this behavior using Group Policy or a Windows registry adjustment, as explained here.
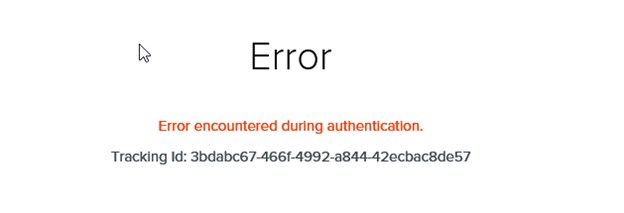
Note: If you encounter an authentication error when opening a new tab in Ming.le (as shown below)

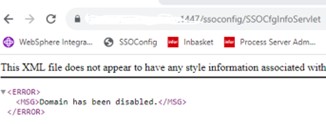
If you encounter the following 500 service error “Cannot handle action type 3” when opening Infor Process Administrator, follow these steps to resolve the issue.
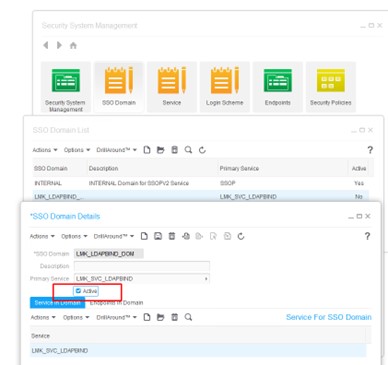
First go to the <server name>:<port>/ssoconfig/ssoCfgInfoServlet site to see if you can get a more descriptive message. If the message there reads “Domain has been disabled”, this means the Domain for your Process Server Administrator site is disabled and needs to be enabled. In Rich Client > Gen (Or the Gen web admin), go to Security System Management > SSO Domain, and select the Domain for your site. Click the check box to enable it, then flush the GEN configuration, or reboot the server. Refer to the screenshots below for guide.


Portal Timeout
To configure a timeout duration for users’ session to timeout after no activity
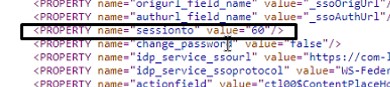
The Lawson delivered default value for session timeout is 60 minutes. If you wish to change the timeout duration, you can use the ssoconfig utility to change it at any time. The timeout value does not affect performance.
To change the SSO timeout parameter complete the following steps:
Note:
The SAML Token Lifetime value is equal to the “sessionto” from SSOCfgInfoServlet.