Adding a custom field to a form using Configuration Console
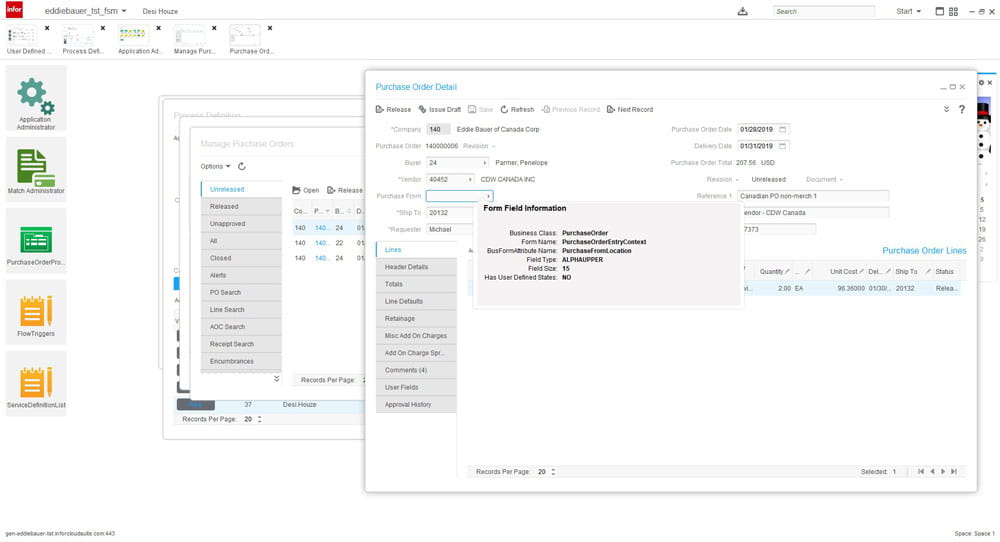
Find the name of the Form and the Business Class that you want to add the field to (Ctrl-Shift-Click on any field on the form)
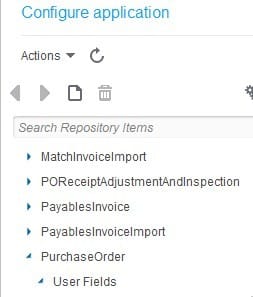
Log into Rich Client and go to Start > Configure > Application (make sure that you have been granted access to Configuration Console)
Find your Business Class, and click “User Fields” under the class
Click the “blank paper” icon to add a new user field
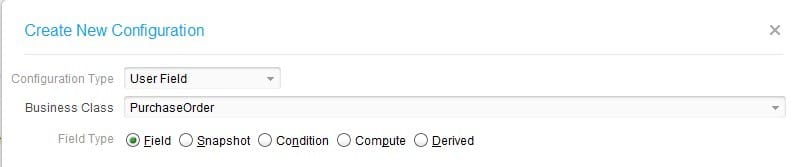
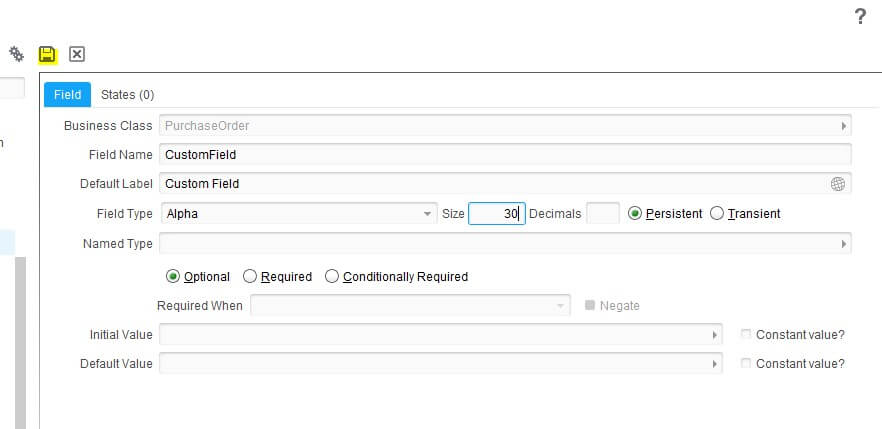
Give your user field a meaningful name (no numbers or special characters allowed, and the field name must begin with an upper-case letter)
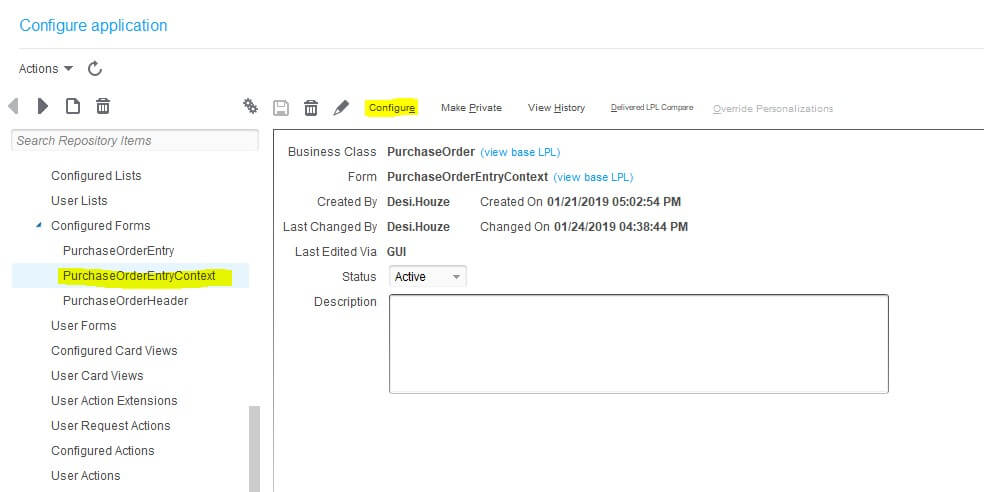
Next, go to configured forms and find the form name that you noted earlier
If this form has never been customized, you may need to click the blank paper icon to add it to the Configured Forms list
Once the form has been added as a configured form, click on the form name, then click “Configure”
Navigate to the location where you want to add the user field
Click the blank paper and select “User Field”

Configure the user field for the form
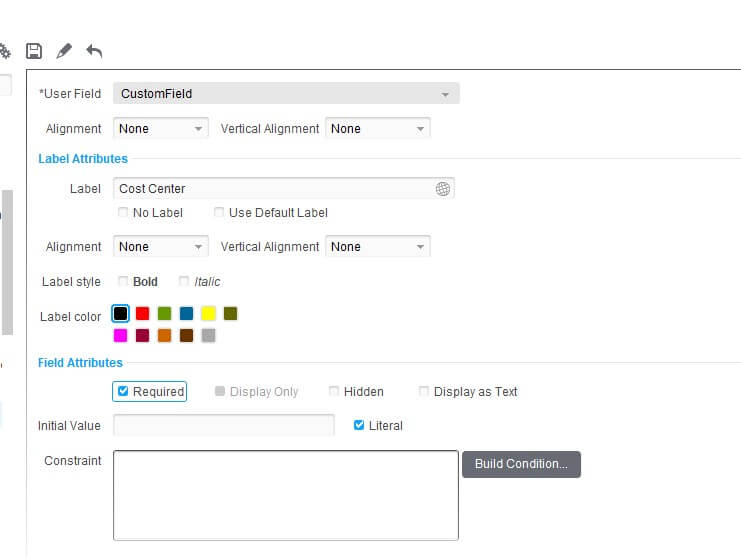
Click “Save” and verify that the user field is now on your screen